Dropping an iPhone onto asphalt, bathroom tile, or a rough concrete sidewalk is an experience that instantly produces dread. The sound of high-velocity glass meeting hard stone is unmistakable, and picking up the phone to assess the aftermath often reveals a spiderweb of shattered fractures across the front glass. For millions of smartphone owners worldwide, this moment marks the beginning of an immediate dilemma: does this device need an iPhone screen repair, or is a full iPhone screen replacement required?
The distinction between screen repair and screen replacement is one of the most widely misunderstood concepts in the consumer electronics servicing industry. Search engine queries, customer service desks, and advertisements often use the phrases interchangeably, giving the false impression that they refer to the exact same procedure. In reality, repairing a damaged screen and replacing the entire display assembly are two completely different technical processes that involve different machinery, varied skill levels, distinct risk profiles, and substantially different price points.
Outer glass delamination and refurbishment—commonly called glass repair—focuses on saving the factory-original display matrix underneath while peeling away and renewing only the shattered surface glass. Conversely, modular screen replacement involves unseating the entire multi-layered display assembly from the chassis and installing a completely new panel. Understanding the structural differences between these two solutions empowers device owners to make informed financial and technical choices. Deciding correctly prevents overpaying for unnecessary parts when simple glass refurbishment is viable, while simultaneously avoiding low-quality repairs that leave dangerous internal defects unaddressed.
Modern iPhones represent sophisticated engineering marvels where the screen is far more than a simple pane of protective glass. Beneath the smooth Ceramic Shield exterior lies a calibrated stack of optical coatings, high-density capacitive sensors, and microscopic organic light-emitting diodes that communicate directly with the phone's central processor through encrypted security protocols. Navigating this ecosystem requires a clear grasp of display hardware, diagnostic indicators, and industry standards. This guide breaks down the science of iPhone displays, details how glass refurbishment contrasts with modular replacement, outlines exact symptoms for both paths, compares real-world costs across device generations, and demonstrates how to choose the exact solution your iPhone truly needs.
Understanding Modern iPhone Display Technology: The Multi-Layer Stack
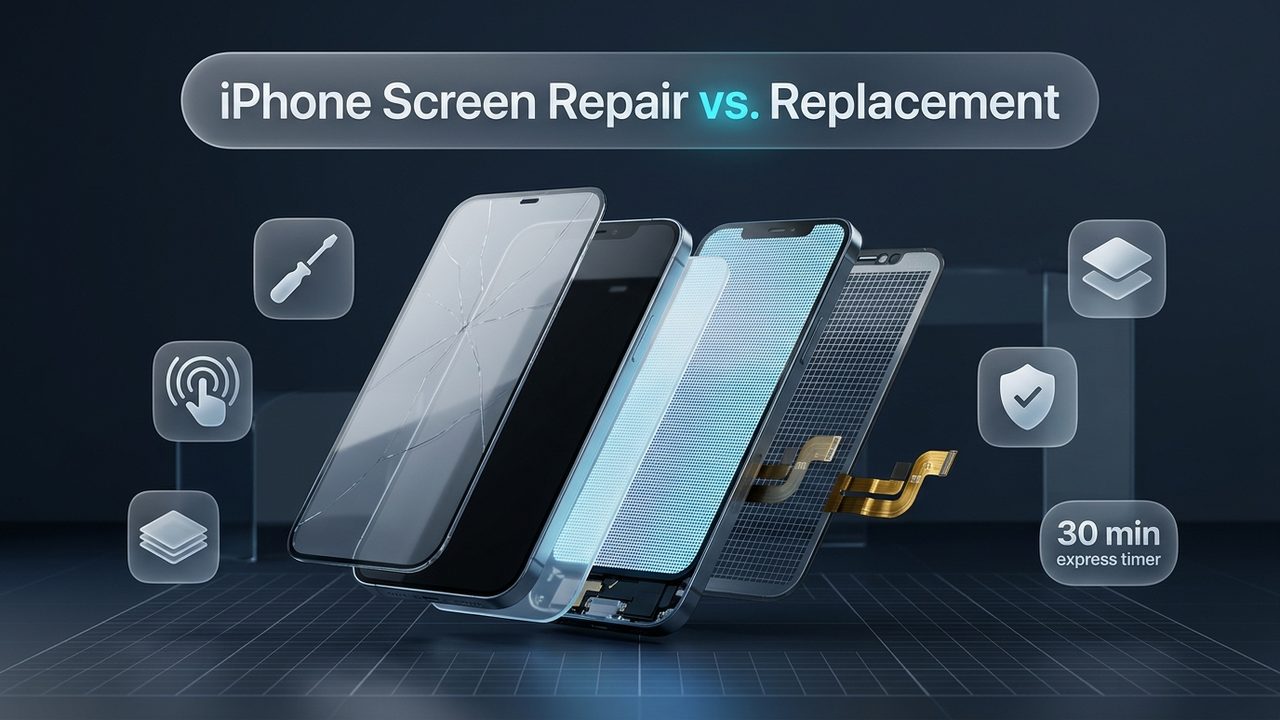
Evaluating whether a damaged device requires refurbishment or a complete assembly swap begins with understanding what an iPhone display actually consists of. When looking at a smartphone, the human eye perceives a single flat surface displaying icons, video, and text. Beneath that polished exterior sits an intricately bonded sandwich of independent hardware layers, each engineered to perform an indispensable sensory, optical, or structural function.
Apple transitioned its primary flagship line to Super Retina OLED technology starting with the iPhone X in 2017, culminating in the Super Retina XDR displays found across modern iPhone models. Earlier generations, along with budget-tier models like the iPhone 11 and iPhone SE lineups, utilized Liquid Retina IPS LCD panels. While LCD and OLED architectures differ fundamentally in illumination mechanics, both share a multi-layered composite structure that determines how damage manifests after an impact.
1. Cover Glass and Ceramic Shield Substrate
The outermost layer of the display assembly is the exterior cover glass. On iPhone models prior to the iPhone 12, this layer consisted of chemically strengthened dual-ion exchange aluminosilicate glass manufactured by Corning. Beginning with the iPhone 12 and continuing through modern iPhone generations, Apple introduced Ceramic Shield. This material incorporates nanoscale ceramic crystals embedded directly within the glass matrix through a high-temperature crystallization manufacturing step. While Ceramic Shield dramatically increases drop resistance and structural toughness compared to standard glass formulations, it remains susceptible to micro-abrasions, pressure cracks, and localized shattering upon point-source impacts against hard aggregate surfaces.
2. Optically Clear Adhesive (OCA)
Directly beneath the cover glass sits a microscopic, uniform layer of Optically Clear Adhesive, commonly abbreviated as OCA. This specialized synthetic resin bonds the protective glass directly to the touch sensor and display layers without introducing optical distortion, air pockets, or refractive hazing. OCA must maintain pristine clarity across extreme temperature ranges while providing sufficient shear strength to resist delamination during daily thermal expansion and mechanical flexing.
3. Capacitive Digitizer Sensor Grid
Underneath the bonding adhesive is the capacitive touch digitizer. The digitizer consists of an ultra-thin matrix of transparent indium tin oxide (ITO) electrodes arranged in intersecting rows and columns. When a conductive human fingertip approaches or contacts the glass surface, it alters the local electrostatic field at specific coordinate intersections. Dedicated touch controller silicon interprets these continuous capacitance variations hundreds of times per second, translating physical gestures, swipes, and multi-finger pinches into operating system commands. If this grid fractures, touch responsiveness degrades or disappears entirely.
4. Circular Polarizer Film
Mounted above the emissive pixels is a circular polarizing filter. Ambient sunlight and indoor light fixtures emit unpolarized rays that penetrate cover glass and bounce off reflective internal metal traces. Without a polarizer, this internal bounce would wash out screen contrast and render the display illegible outdoors. The circular polarizer selectively blocks reflected light waves while allowing light produced by the phone's pixels to exit freely, preserving deep black levels, vibrant color saturation, and sharp text readability under direct sunlight.
5. The Emissive Display Matrix (OLED vs. LCD)
The heart of the visual engine is the display matrix itself. On modern OLED-equipped iPhones, this layer consists of an Active Matrix Organic Light-Emitting Diode (AMOLED) panel utilizing sub-pixel Diamond PenTile layouts. Millions of individual microscopic red, green, and blue organic diodes emit their own discrete photons when stimulated by electrical current, completely eliminating the need for a separate backlighting unit. This self-emissive architecture enables infinite contrast ratios, as true black is achieved simply by shutting off individual pixels entirely. On legacy LCD iPhones such as the iPhone 11 or iPhone XR, the display panel utilizes liquid crystal molecules that modulate light emitted from a separate white LED backlight unit positioned along the rear of the panel stack.
6. Flexible Polyimide Substrate
Unlike rigid glass panels used in older television monitors or budget tablets, modern iPhone OLEDs are fabricated atop a flexible polyimide plastic substrate. This ultra-thin, heat-resistant plastic base allows Apple engineers to physically bend and curve the bottom edge of the display panel backward underneath itself inside the frame. This ingenious folded design houses the chip-on-film (COF) display driver silicon inside the device chassis, eliminating the wide bottom bezel or "chin" that characterized earlier smartphone generations.
7. Frame Bracket, Shielding, and Interconnect Ribbon Cables
Encapsulating the entire optical assembly is a high-precision polycarbonate or magnesium-alloy frame bracket. This bracket features laser-welded alignment tabs, threaded screw posts, and precision-cut grounding springs that seat directly into the iPhone's outer titanium or aerospace-grade aluminum enclosure. Extending from the rear of the display are flexible printed circuit (FPC) ribbon cables carrying high-speed Mobile Industry Processor Interface (MIPI) display signaling, touch data, ambient light sensor feedback, and power rails directly to the logic board.
Every single one of these seven layers is engineered to operate in micro-millimeter harmony. A sudden physical blow may crack the top glass without touching the delicate OLED matrix underneath, or deep impact energy may punch straight through the glass, rupturing fragile organic pixels and severing digitizer traces. Identifying which specific layers have sustained damage is the foundational step that determines whether glass repair or full assembly replacement is the correct remedy.
| Display Component Layer | Primary Structural Function | Failure Symptoms When Damaged | Service Feasibility |
|---|---|---|---|
| Cover Glass / Ceramic Shield | Physical protection, optical clarity, drop impact defense | Visible spiderweb cracks, loose glass shards, rough tactile surface | Glass refurbishment (repair) or full replacement |
| Optically Clear Adhesive (OCA) | Index-matched bonding between glass and sensor layer | Bubbles, cloudiness, rainbow Newton rings, delamination | Re-laminated during glass refurbishment |
| Capacitive Digitizer Grid | Registers finger input coordinates and multi-touch gestures | Dead touch zones, erratic ghost touching, total input failure | Requires full screen replacement in most cases |
| Circular Polarizing Filter | Eliminates surface glare and internal light reflections | Severe glare outdoors, washed-out colors, metallic sheen | Stripped and replaced during specialized refurbishing |
| OLED / LCD Emissive Matrix | Generates actual image pixels, colors, and brightness | Black ink spots, green vertical lines, flickering, black screen | Strictly requires complete screen replacement |
| Display Flex Ribbon Interconnect | Transmits power, data, and clock signals to logic board | Intermittent video dropout, white screen of death, no display | Microsoldering flex bond or full replacement |
What Is iPhone Screen Repair? The Science of Glass Refurbishment
When professional technicians speak strictly about iPhone screen repair—as opposed to replacing the whole unit—they are generally referring to the specialized craft of glass refurbishment. This procedure aims to rescue and preserve the original factory-installed Apple display panel by peeling off the damaged cover glass and laminating a flawless replacement sheet in its place.
Glass refurbishment is an intricate, cleanroom-grade process that demands high-precision industrial machinery. Unlike a modular screen swap that can be performed at a standard workbench with handheld drivers, glass-only repair involves several complex thermodynamic and chemical phases:
1. Testing and Initial Triage
Technicians subject the phone to a battery of automated and manual diagnostic routines. The technician examines every individual pixel block under high magnification to confirm that there are zero dead pixels, zero color bleeding, and zero structural anomalies in the organic emissive array. Crucially, the touch digitizer must respond flawlessly across all coordinates. If the underlying OLED or touch grid shows even the slightest defect, glass-only repair cannot succeed, and the panel must be scheduled for a full assembly swap.
2. Bezel Frame Separation
Once certified as a viable refurbishment candidate, the display assembly is extracted from the phone and placed on a specialized heating plate. The technician softens the cold-cure polyurethane adhesive securing the plastic perimeter frame bracket to the display glass. Using micro-chisels and specialized pry shims, the bracket is cleanly separated without exerting torsional strain on the fragile edges of the OLED panel.
3. Delamination via Cryogenic Freezing or Micro-Wire Slicing
Separating the shattered glass from the flexible display matrix is the most delicate phase of the entire operation. Modern laboratories generally utilize one of two advanced methodologies:
- Cryogenic Nitrogen Freezing: The assembly is placed inside a cryogenic chamber cooled by liquid nitrogen to temperatures reaching -150°C to -180°C. At these extreme negative temperatures, the chemical bonds inside the OCA layer contract and crystallize instantly, losing their adhesive elasticity. With a gentle tap, the fractured glass cleanly pops free from the underlying display panel without subjecting the electronics to mechanical friction or localized heat stress.
- Heated Vacuum Micro-Wire Separation: The display is held firmly against a heated vacuum table maintained at exactly 75°C to 80°C. The technician threads an ultra-fine wire made of molybdenum or tungsten alloy—measuring between 0.028mm and 0.04mm in thickness—between the glass and the polarizing film. Working the wire back and forth in a smooth, rhythmic sawing motion, the wire slices cleanly through the softened OCA layer, physically detaching the shattered glass.
4. Chemical Glue Stripping and Polarizer Cleaning
Following separation, residual adhesive clings to the surface of the display. Technicians use motorized glue remover spindles spinning at controlled RPMs, combined with specialized organic solvents such as high-purity methyl ethyl ketone or terpene formulations, to dissolve the remaining adhesive. The surface is wiped repeatedly inside a laminar flow cleanroom workbench using lint-free microfiber pads until the exposed surface achieves optical purity.
5. OCA Film Application and Vacuum Lamination
The pristine OLED panel is placed inside a precision-machined aluminum alignment mold tailored to the exact physical dimensions of the specific iPhone model. A fresh sheet of Mitsubishi-grade Optically Clear Adhesive film is applied using an automated silicone roller to eliminate air entrapment. Next, a brand-new piece of tempered cover glass—often reinforced with oleophobic coatings—is lowered onto the assembly. The entire jig enters an industrial vacuum laminating machine. The chamber draws down to complete negative atmospheric pressure, eliminating all ambient air before an inflatable silicone bladder descends, pressing the glass and display together with perfectly calibrated, uniform pneumatic pressure.
6. Autoclave Pressure Curing
Even with industrial vacuum lamination, microscopic gas molecules can remain trapped between the optical layers. The laminated display is immediately transferred into a heated pressure autoclave chamber. The autoclave pressurizes the environment to 6 to 8 bars of atmospheric pressure while maintaining a steady temperature of 45°C to 50°C for approximately ten to fifteen minutes. The intense pressure forces any residual microscopic air molecules to dissolve completely into the adhesive matrix, curing the laminate into a crystal-clear, bubble-free optical bond.
Choosing glass-only refurbishment delivers several compelling benefits when conditions allow. Because the original Apple OLED matrix remains untouched, the device retains its authentic factory color calibration, 120Hz ProMotion refresh timing, dynamic peak brightness curves, and low power consumption metrics. Furthermore, because the original display driver flex circuit remains mated to the device, the procedure avoids triggering iOS unauthorized component notifications. However, glass refurbishment is time-intensive, requires substantial capital equipment, and cannot be performed if the underlying display matrix has suffered even microscopic impact damage.
What Is iPhone Screen Replacement? The Modular Assembly Swap
When physical damage extends beyond the exterior surface glass and breaches the functional optical layers beneath, glass refurbishment is no longer an option. Under these circumstances, technicians perform an iPhone screen replacement. This comprehensive repair procedure involves removing the compromised display assembly in its entirety—including the shattered glass, damaged digitizer, ruptured OLED panel, structural bracket, and integrated flex cables—and installing a completely new, integrated display unit.
Modular screen replacement represents the industry standard across high-volume repair centers and authorized service providers alike. It offers a definitive, reliable restoration for catastrophic impacts, structural frame deformities, and unrecoverable electronic failures. Unlike glass delamination, which can take several hours of laboratory prep, a skilled technician can complete a precision modular screen replacement in approximately thirty to forty-five minutes.
When Is Full Screen Replacement Strictly Necessary?
Attempting to salvage a broken screen through glass refurbishment is physically impossible if any of the following hardware failure symptoms are present:
- Internal Black Ink Blotches (OLED Bleeding): Deep kinetic impact can puncture the microscopic encapsulation barrier of the organic light-emitting layer. Once ambient oxygen and moisture penetrate this hermetic seal, the organic compounds oxidize and decompose instantly. This chemical breakdown creates expanding inky black blobs that swallow portions of the screen. These blotches are irreversible and spread steadily over time.
- Green, White, or Pink Vertical Lines: Bright, laser-straight vertical or horizontal lines shooting across the panel indicate severe hardware failure. This symptom occurs when the flexible printed circuit bonding (Chip-on-Film / Chip-on-Glass) separates along the bottom edge, or when internal conductive silver micro-traces are fractured. No amount of exterior glass replacement can restore severed electrical buses.
- Erratic Ghost Touching or Dead Input Zones: If the iPhone registers phantom screen taps without user contact, or if entire sections of the keyboard fail to respond, the capacitive indium tin oxide digitizer grid has sustained micro-fractures. Because the digitizer is physically bonded into the display stack on modern iPhones, restoring reliable touch functionality requires swapping the entire assembly.
- Complete Black Screen with Active Haptics: Dropping a phone can cause internal substrate cracking that cuts all power to the display matrix while leaving the underlying logic board fully operational. The device may ring, vibrate, play notification chimes, or charge normally, yet the screen remains entirely pitch black. This total optical blackout necessitates full modular replacement.
- Severe Bezel Frame Separation and Crushed Corners: Severe corner impacts often crush the protective frame, shearing the delicate grounding tabs and tearing ribbon cables along the edge. Replacing the entire integrated assembly ensures proper physical alignment and structural integrity inside the chassis.
The Hierarchy of Replacement Display Qualities
When selecting a modular replacement, consumers encounter an array of replacement panel categories available throughout the repair market. Each tier balances manufacturing provenance, optical fidelity, structural durability, and overall service cost differently:
| Replacement Panel Tier | Manufacturing Technology | Color & Brightness Accuracy | Structural Durability | Relative Price Point |
|---|---|---|---|---|
| Original OEM / Service Pack | Factory-certified Apple component identical to original build | 100% matched, full HDR peak brightness (up to 2000 nits) | Highest; authentic Ceramic Shield specification | Premium / Highest investment |
| OEM Refurbished | Original Apple OLED recycled with new high-grade cover glass | 98%–100% original color accuracy, native refresh rates | High; tempered aftermarket or OEM-spec glass | Moderate-High / Excellent value |
| Aftermarket Soft OLED | Flexible polyimide substrate matching original Apple curves | 90%–95% color gamut match, excellent contrast | High drop resilience due to flexible internal substrate | Moderate / Industry benchmark |
| Aftermarket Hard OLED | Rigid glass substrate base rather than flexible polyimide | 85%–90% color match, slightly thicker bottom chin bezel | Lower; rigid glass substrate is brittle upon secondary drops | Economy / Budget-conscious |
| Aftermarket Incell LCD | Backlit LCD panel retrofitted into an OLED chassis | 70%–80% color accuracy, grayed blacks, lower contrast | Moderate; thicker assembly causes slight frame lip protrusion | Lowest / Temporary fix |
Understanding these hardware tiers is crucial when booking a repair service. While budget aftermarket LCDs provide an inexpensive temporary option for older devices, they drain battery faster due to continuous backlighting and lack true HDR dynamic range. Premium Soft OLED and OEM assemblies restore the device to its intended factory specifications, preserving visual comfort and touch accuracy for years to come.
Diagnostic Guide: Identifying Exactly Which Service Your iPhone Requires
Determining whether an iPhone needs an iPhone screen repair (glass refurbishment) or an iPhone screen replacement does not require dismantling the chassis or possessing specialized laboratory instruments. By running a methodical series of non-invasive physical and visual diagnostics, any device owner can pinpoint the exact scope of hardware damage within minutes.
Perform the following five-step inspection protocol in a clean, well-lit environment to accurately assess your screen's condition:
Step 1: The Glancing-Angle Surface Reflection Test
Turn off the iPhone screen completely so the display surface rests in a dark, unlit state. Tilt the phone slowly under a bright desk lamp or overhead ceiling light, watching the reflected light glide across the glass. Observe whether the fracture lines are strictly confined to the glossy top layer, or if deep internal shadows and micro-voids appear beneath the glass plane. If the cracks cast shadows onto an intact, dark mirror surface below, the exterior glass has shattered while leaving the underlying display stack undamaged.
Step 2: The Full-Spectrum Touch Grid and Drag Test
Power on the device and unlock the home screen. Press and hold any app icon until all icons begin to jiggle in edit mode. Slowly drag the icon across every square centimeter of the display in a tight serpentine pattern, paying careful attention to corners, the upper notification swipe-down area, and the bottom gesture bar. If the icon slips from your finger, snaps back, or refuses to follow your swipe in specific sections, the capacitive digitizer grid has fractured. If the icon tracks your touch effortlessly across every millimetric coordinate without stuttering or phantom clicks, the digitizer layer is completely healthy.
Step 3: The Pure White Canvas Inspection
Open Safari or the Notes app and pull up a solid, pure white background. Increase the screen brightness to one hundred percent. Examine the entire white surface for visual defects:
- Look for faint pink, yellow, or blue discolorations along the fracture lines.
- Scan for tiny localized bright spots where impact pressure crushed the light-distributing layers.
- Check for static burn-in images or uneven brightness gradients across the panel corners.
If the white field displays uniform, clean illumination right up to the edges of the surface cracks, the emissive display matrix remains structurally sound.
Step 4: The Dark Room Deep-Black Test
Take the iPhone into a pitch-black room or dim closet and display a pure black image or launch a full-screen video with letterboxed black bars. On OLED iPhones, black pixels shut off entirely and emit zero photons. Look for subtle green tinting, flickering rows of pixels, or faint violet hazing around the perimeter. Next, examine whether any irregular black circular spots block the backlight or visual content. Unlike dead pixels which appear as tiny single points, impact ink blotches resemble microscopic liquid pools that obscure text. If any circular black spots or bright colored lines appear, the OLED substrate has ruptured, confirming the immediate need for a full screen replacement.
Step 5: Dynamic Island, TrueDepth, and Sensor Array Verification
Modern iPhones house critical biometric hardware directly adjacent to the top edge of the display assembly. Open the Settings app and test Face ID recognition. Test the proximity sensor by placing a phone call and holding your hand near the top receiver speaker to ensure the screen turns off automatically. Finally, verify that automatic brightness responds smoothly when covering and exposing the upper sensor array. If the glass directly over the sensor cluster is crushed into fine powder, the underlying camera prisms may be compromised, requiring specialized alignment during display service.
| Visible Diagnostic Symptom | Damaged Hardware Component | Recommended Service Path | Urgency Level |
|---|---|---|---|
| Spiderweb cracks, image fully visible, touch 100% normal | Outer Ceramic Shield / Cover Glass only | iPhone Screen Repair (Glass Refurbishment) | Moderate; repair before moisture penetrates |
| Cracked glass with localized touch dead spots | Cover Glass and Indium Tin Oxide Digitizer | iPhone Screen Replacement (Full Modular Assembly) | High; prevents accidental lockouts |
| Solid vertical green, pink, or white lines across screen | Display Driver IC / Flexible Circuit Bond | iPhone Screen Replacement (Full Modular Assembly) | Immediate; progressive bus failure imminent |
| Inky black bleeding spots spreading across display | Ruptured OLED Organic Emissive Layer | iPhone Screen Replacement (Full Modular Assembly) | Critical; blotches expand rapidly |
| Phantom tapping (ghost touch) opening apps uncontrollably | Short-circuited Digitizer Controller Grid | iPhone Screen Replacement (Full Modular Assembly) | Critical; can trigger permanent passcode lockout |
| Completely black screen, phone rings, vibrates, and chimes | Severed Substrate Power Line or Display Panel Shatter | iPhone Screen Replacement (Full Modular Assembly) | Immediate; device unusable |
The Software & Calibration Ecosystem: True Tone, Serialization, and Face ID
Replacing an iPhone display involves far more than mechanical fastening and connecting miniature ribbon cables. Over the past decade, Apple has established a deeply integrated hardware serialization ecosystem designed to pair internal components directly to the device's central logic board using cryptographic security keys.
Within every genuine iPhone display assembly, small integrated circuits (ICs) house an electrically erasable programmable read-only memory (EEPROM) chip. During initial factory assembly, Apple servers flash a unique serialized identification hash onto this chip, binding the screen hardware directly to the iPhone's Secure Enclave processor. When an iPhone powers up, the operating system executes a handshake query across the I2C data bus to verify that the cryptographic signature of the attached screen matches the record stored on the motherboard.
The Consequences of Uncalibrated Screen Swaps
If an unverified display assembly is installed without transferring or reprogramming the serialized configuration parameters, the device encounters several functional limitations:
- The "Important Display Message" Notification: iOS generates an alert inside the Settings app stating, "Unable to verify this iPhone has a genuine Apple display." While this notification does not prevent the phone from operating normally, it remains pinned to the main Settings screen for several days before relocating permanently into the About section under Parts and Service History.
- Loss of True Tone Functionality: True Tone uses multi-channel ambient light sensors to automatically adapt the display's color temperature to match ambient lighting conditions. When a screen is swapped without copying the factory color calibration profile from the original EEPROM, iOS disables the True Tone toggle entirely inside the Control Center and Display Settings.
- Potential Auto-Brightness Stutter: The ambient light sensor assembly is mounted to the rear of the display bracket. If this sensor module is damaged, misaligned, or improperly linked during replacement, automated ambient brightness scaling becomes unresponsive, forcing the user to adjust backlight intensity manually.
How Professional Technicians Preserve True Tone and Calibration
Professional repair facilities utilize sophisticated external EEPROM micro-programmers, such as QianLi iCopy or JC V1SE systems, to preserve factory feature sets. Before detaching the damaged display, the technician connects its flex cable to the programmer's terminal interface. The hardware tool extracts the original serial number, touch controller calibration matrix, and display hardware parameters into local flash memory.
Once the replacement screen is unpacked, its flex ribbon is connected to the programmer, which flashes the original serialized profile directly into the new panel's EEPROM. When the new display is mounted inside the iPhone, the operating system detects its native calibration code, preserving True Tone and automatic ambient light tracking flawlessly.
With modern versions of iOS, Apple has expanded access to repair configuration tools through their Self Service Repair and Independent Repair Provider (IRP) programs. Technicians can now initiate cloud-based System Configuration cycles that wirelessly validate authentic replacement modules with Apple servers, clearing unauthorized part warnings without requiring physical chip desoldering.
Protecting the Fragile Face ID Sensor Cluster
Perhaps the most critical risk during an iPhone screen replacement involves the upper receiver and sensor assembly. This compact module houses the ear speaker, proximity sensor, ambient light sensor, and flood illuminator microphone. On models prior to the iPhone 13, this entire cluster is mounted directly to the display backplate and must be transferred to the replacement screen.
The flood illuminator and proximity sensor are cryptographically paired to the logic board for biometric security. If an inexperienced technician tears the microscopic flex ribbon during transfer, Face ID functionality is permanently disabled. Restoring facial recognition after tearing this ribbon requires advanced microsoldering under high-power stereoscopic microscopes to jump broken traces or transplant the optical sensors onto a donor ribbon. Entrusting your device to seasoned technicians eliminates this catastrophic risk.
Cost Analysis & Economic Feasibility: Repair vs. Replacement Across Generations
Financial considerations play a major role when deciding how to resolve a broken smartphone display. Device owners must weigh the upfront cost of repair against the current fair market resale value of the phone, remaining battery longevity, and expected ownership duration. Understanding market price dynamics prevents sinking excessive capital into an aging device or prematurely discarding a flagship phone that could be restored economically.
The cost to fix a broken display varies dramatically depending on the specific model tier, display architecture, and whether the job calls for glass-only repair, third-party modular replacement, or manufacturer-authorized service:
1. Legacy LCD Models (iPhone 11, iPhone XR, iPhone SE Series)
Older generation iPhones utilizing liquid crystal displays feature the most economical servicing costs across the entire Apple catalog. Because backlit LCD panels do not require expensive organic emissive materials, complete modular assemblies are readily accessible. A high-quality full display replacement for an iPhone 11 or iPhone SE typically ranges between $70 and $110 at independent repair centers. In this category, opting for glass refurbishment is rarely cost-effective, as the intensive labor required to delaminate and clean the panel often exceeds the price of an entire new replacement assembly.
2. Standard Baseline OLED Flagships (iPhone 12, 13, 14, 15, 16)
Mainstream Apple flagships feature 60Hz Super Retina XDR OLED displays. These panels deliver vibrant contrast and high brightness, but replacement parts carry higher wholesale costs. Modular replacement with a premium Soft OLED assembly generally ranges from $130 to $220 depending on device generation. For these models, professional glass-only repair (when the OLED is completely undamaged) offers attractive savings, typically costing between $100 and $160 while maintaining authentic Apple color calibration.
3. Pro and Pro Max Flagships (iPhone 13 Pro through iPhone 16 Pro Max)
Apple's Pro tier represents the most technologically advanced and expensive displays in the smartphone sector. These panels incorporate low-temperature polycrystalline oxide (LTPO) backplanes capable of dynamic 120Hz ProMotion variable refresh rates, peak outdoor brightness reaching 2,000 nits, and ultra-slim curved bezels. OEM service pack replacements for Pro Max models can range from $280 to over $400. In this high-end category, glass-only refurbishment delivers immense value: if the underlying 120Hz LTPO OLED matrix is fully intact, refurbishing the exterior glass saves the customer between $120 and $180 compared to purchasing a brand-new factory display assembly.
| iPhone Model Tier | Display Panel Technology | Estimated Glass Repair Cost | Estimated Screen Replacement | Recommended Strategy |
|---|---|---|---|---|
| iPhone SE (2nd & 3rd Gen) | 4.7" Liquid Retina IPS LCD | $55 – $75 (Rarely offered) | $65 – $95 | Full Screen Replacement |
| iPhone 11 | 6.1" Liquid Retina IPS LCD | $65 – $85 (Rarely offered) | $75 – $110 | Full Screen Replacement |
| iPhone 12 / 12 Pro | 6.1" Super Retina XDR OLED | $95 – $130 | $125 – $175 | Glass Repair if OLED is pristine |
| iPhone 13 / 14 / 15 | 6.1" Super Retina XDR OLED | $110 – $155 | $145 – $220 | Glass Repair saves significant cost |
| iPhone 13 Pro / 14 Pro | 6.1" LTPO 120Hz ProMotion OLED | $140 – $195 | $240 – $340 | Glass Refurbishment highly advised |
| iPhone 15 Pro Max / 16 Pro Max | 6.7" / 6.9" LTPO 120Hz OLED | $175 – $240 | $320 – $440 | Glass Refurbishment yields major savings |
When assessing overall device economics, take stock of other worn components as well. If your phone has accumulated hundreds of charge cycles, bundling your screen service alongside an iPhone battery replacement or inspecting a loose lightning/USB-C connection for a charging port repair restores the entire phone to peak operational performance in a single service visit.
DIY Screen Replacement vs. Professional Service: Assessing the Hidden Risks
In an era filled with online video tutorials and inexpensive mail-order repair kits, many smartphone users consider undertaking a screen replacement on their own. While the idea of saving labor fees can be tempting, modern iPhone repair is a precision micro-engineering discipline with zero tolerance for mechanical error. Understanding the technical pitfalls that accompany do-it-yourself attempts helps device owners evaluate whether the financial savings justify the genuine risks of permanent hardware destruction.
1. The Danger of "Long Screw Damage"
Modern iPhones utilize dozens of microscopic screws that differ from one another by fractions of a millimeter. For example, the metal bracket securing the display flex cables to the logic board might feature three screws measuring 1.2mm in length and one screw measuring 1.3mm. Because these screws look identical to the naked eye, inexperienced hobbyists frequently reinstall them into the wrong threaded standoffs.
Driving a 1.3mm screw into a 1.2mm hole creates a devastating condition known throughout the repair industry as "long screw damage." The extra tenth of a millimeter drives the hardened steel screw tip straight through the protective surface layer of the logic board, severing microscopic copper data traces running directly beneath the standoff. This microscopic puncture can cause permanent boot looping, blue screens of death, total loss of Wi-Fi communication, or complete motherboard failure that can only be salvaged through hundreds of dollars worth of specialist micro-soldering trace reconstruction.
2. Puncturing the Lithium-Ion Battery
Modern iPhone displays are secured to the outer chassis with aggressive industrial perimeter adhesive. Loosening this seal requires applying controlled, uniform heat. DIY fixers often resort to hair dryers or household heat guns that apply uneven, excessive heat directly over the battery compartment. Even worse, attempting to pry open the tight display seam with metal spudgers, razor blades, or screwdriver tips carries the imminent danger of slipping and puncturing the pouch of the lithium-ion battery. Piercing a battery pouch causes an instantaneous internal short circuit that triggers thermal runaway, producing noxious plumes of toxic smoke and hazardous combustible flames.
3. Stripped Fasteners and Pentalobe Failure
Apple utilizes proprietary tamper-resistant Pentalobe (five-point star) and Tri-Point (Y000) fasteners throughout their assemblies. Inexpensive DIY toolkits bundled with budget replacement screens often include screwdriver bits forged from soft, low-grade pot metal. Using a low-precision screwdriver quickly rounds off the shallow screw heads, stripping the fastener inside the chassis. Extracting a stripped micro-screw requires micro-drilling under high-powered magnification—a delicate procedure that can easily cause severe cosmetic and structural damage to the housing.
4. Loss of Factory Ingress Protection (Water Resistance)
Every iPhone from the iPhone 7 onward features an IP67 or IP68 water and dust ingress protection rating achieved through closed-cell adhesive gaskets seated between the display bracket and the frame. Opening a phone permanently destroys this factory gasket. Proper service requires thoroughly scraping away all aged adhesive residue using specialized chemical de-bonders, followed by rolling and pressing a precision die-cut OEM-grade perimeter seal into the housing before clamping the phone under calibrated mechanical pressure. DIY repairs almost universally skip this meticulous prep work, leaving the device completely vulnerable to moisture penetration from steam, rain, or light liquid spills.
| Repair Parameter | Do-It-Yourself (DIY) Approach | Professional Repair Facility |
|---|---|---|
| Tooling & Calibration | Generic plastic spudgers, budget screwdrivers, hair dryer | Torque drivers, heating plates, EEPROM programmers, cleanroom mats |
| True Tone & Sensor Transfer | Usually disabled due to lack of specialized programming tools | Flawlessly preserved via serial transfer and system calibration |
| Motherboard & Battery Safety | High risk of long screw damage, trace tearing, or thermal puncture | Zero risk; ESD-safe protocols, magnetic screw mapping, strict isolation |
| Water Resistance Integrity | Lost entirely; improper seal cleaning and lack of clamping pressure | Restored using OEM pre-cut die-cut gaskets and pressure jigs |
| Turnaround Time | Multiple days waiting for parts shipping + 2-3 hours high-stress labor | 30 to 45 minutes on-site while you wait |
| Warranty Protection | None; user assumes 100% financial liability for all mistakes | Comprehensive multi-month or lifetime parts & labor warranty |
Step-by-Step Overview: How Professional Technicians Service an iPhone Screen
Understanding the meticulous steps followed by certified repair professionals provides peace of mind when entrusting your valuable device to a repair center. Whether performing an iPhone repair, addressing an Android device with Samsung repair, or fixing complex hardware on a laptop repair, professional technicians adhere to structured, industry-standard service protocols.
Phase 1: Pre-Service Intake & Diagnostics
Technicians initiate the repair process by documenting the physical condition of the device and executing a full multi-point diagnostic routine. They test touch sensitivity, front and rear cameras, Face ID biometrics, proximity sensors, microphone inputs, speaker clarity, and cellular connectivity. This baseline assessment verifies that all secondary features are operating normally before disassembly begins.
Phase 2: Controlled Thermal Softening and Precision Opening
The technician removes the two bottom Pentalobe screws flanking the charging port and seats the iPhone into a temperature-controlled display opening fixture. The tool applies uniform heat between 70°C and 75°C to soften the internal waterproof adhesive without exposing the logic board or battery to thermal shock. Using a micro-calibrated suction clamp, the tool gently lifts the display edge upward while the technician inserts an ultra-thin polymer pry pick to slice the softened perimeter gasket. The screen opens smoothly to the side like a book, strictly avoiding any tension on the delicate ribbon cables.
Phase 3: Power Isolation
The golden rule of professional micro-electronics repair is immediate electrical isolation. Before touching any display ribbon, the technician unfastens the tri-point screws securing the battery connector shield plate, removes the bracket, and disconnects the battery terminal using a non-conductive nylon spudger. Cutting power prevents accidental short circuits that could burn out the display power rails or damage sensitive backlight circuitry on the motherboard.
Phase 4: Sensor Transfer and EEPROM Programming
The technician unseats the display cables and frees the broken assembly from the chassis. If the device requires modular screen replacement, the technician carefully unfastens the upper speaker and sensor module, warming the adhesive bed to release the flood illuminator without straining the flex ribbon. The technician then connects the original display to an EEPROM programmer to copy the factory calibration codes, flashing them onto the new replacement display to ensure seamless True Tone compatibility.
Phase 5: Chassis Prep and Waterproof Gasket Installation
A new screen cannot sit flat against a dirty frame. The technician removes all traces of old adhesive, dust, and microscopic glass shards from the interior perimeter of the housing using isopropyl alcohol and brass cleaning brushes. Once the mating surface is spotless, the technician applies a brand-new, factory die-cut waterproof adhesive gasket, burnishing it firmly along the frame perimeter.
Phase 6: Reassembly, Torque-Spec Fastening, and Quality Assurance
The technician connects the replacement display, reconnects the battery terminal, and secures all metal shield plates using calibrated torque screwdrivers. Before applying final clamping pressure, the technician boots the device to verify touch accuracy, True Tone activation, auto-brightness, and camera clearance. Finally, the display is seated into the chassis and clamped inside a precision press to bond the waterproof gasket permanently, followed by re-securing the bottom Pentalobe screws.
Preventive Measures to Protect Your iPhone Screen After Service
Investing in quality screen restoration deserves to be protected by sound everyday care habits. Modern smartphone displays operate under constant physical, thermal, and mechanical stress. Adopting several practical protective strategies dramatically reduces the risk of sustaining another costly crack in the future:
1. High-Density 9H Tempered Glass vs. Edge-to-Edge Privacy Protectors
Applying a high-grade 9H tempered glass screen protector is the most effective defense against surface damage. Tempered glass acts as a sacrificial impact barrier: when a sharp rock or metal edge strikes the screen, the tempered protector shatters internally, absorbing and dispersing the kinetic energy before the shockwave can reach your iPhone's actual Ceramic Shield. When selecting a protector, choose models featuring oleophobic electroplating to resist finger oils, and prioritize 2.5D or 3D curved-edge designs that extend to the outer rim of the display without lifting.
2. Dual-Layer Impact Cases with Raised Bezel Lips
A high-quality protective case should provide more than simple scratch defense for the rear glass. Look for dual-layer cases that combine a shock-absorbing thermoplastic polyurethane (TPU) inner lining with a rigid polycarbonate outer shell. Crucially, verify that the case incorporates a raised protective bezel measuring at least 1.0 to 1.5 millimeters above the plane of the screen. This raised lip ensures that when the phone is placed face-down or dropped on a flat surface, the screen glass never makes direct contact with the ground.
3. Avoiding Thermal Stress and Dashboard Heat Traps
Modern OLED panels are sensitive to extreme heat. Leaving an iPhone mounted to a vehicle windshield in direct summer sunlight exposes the device to interior temperatures exceeding 140°F (60°C). Extreme thermal buildup accelerates the aging of organic light-emitting polymers, weakens optical bonding adhesives, and can cause permanent OLED discoloration or touch sensitivity anomalies. Keep your device sheltered from direct thermal exposure and avoid charging under pillows or heavy blankets where heat cannot escape.
4. Monitoring Battery Health and Swelling
A frequently overlooked cause of display failure originates from inside the phone. When aging lithium-ion batteries degrade, chemical decomposition can generate gas buildup that causes the battery pouch to swell. As the battery expands, it exerts immense upward pressure directly against the back of the display assembly. This pressure can push the screen outward from the frame, create visible purple or white stress spots on the display, and ultimately crack the glass from the inside out. Regularly check your battery health in iOS Settings, and schedule a replacement if the battery exhibits physical swelling or rapid capacity drops.
Expert iPhone Screen Solutions at DC Phone Repair
Dealing with a cracked, shattered, or unresponsive iPhone display can disrupt your communication, work, and daily schedule. Rather than guessing whether your device needs delicate glass refurbishment or a comprehensive modular screen replacement, let our certified technical team evaluate your hardware with precision and transparency. At DC Phone Repair, we provide fast, dependable, and affordable technical services designed to restore your smartphone to flawless factory condition.
Our experienced technicians utilize cleanroom-grade separation machinery, genuine-specification replacement panels, and advanced EEPROM programmers to ensure that critical features like True Tone, 120Hz ProMotion, and Face ID operate exactly as Apple intended. We stock a comprehensive inventory of authentic and premium-grade displays, enabling us to complete most iPhone screen repairs and modular replacements within thirty to forty-five minutes. Every repair is backed by our rock-solid parts and labor warranty, giving you total confidence and peace of mind.
Whether you need an immediate walk-in repair, want to schedule a convenient appointment, or require expert servicing for related electronics like Samsung repair, laptop repair, or gaming console repair, DC Phone Repair is your trusted neighborhood service center.
DC Phone Repair
2704 Marion Barry Ave SE,
Washington DC 20020, United States
Walk-ins Welcome • Rapid Same-Day Turnaround • Free Comprehensive Diagnostic Estimates
Frequently Asked Questions
Can you replace just the glass on an iPhone screen?
Yes, replacing only the outer glass is technically possible through specialized industrial glass refurbishment if the underlying OLED or LCD panel and touch digitizer are completely undamaged. This delicate process involves separating the cracked glass with liquid nitrogen freezing or micro-wire cutting, followed by laminating new glass in a cleanroom autoclave. When the underlying display matrix has sustained ink blotches, green lines, or dead touch spots, a complete screen replacement is strictly required.
Will an iPhone screen replacement disable True Tone or Face ID?
A professional screen replacement will not disable True Tone or Face ID when performed by experienced technicians utilizing dedicated programming tools. True Tone is preserved by transferring serialized calibration data from the original display's EEPROM chip onto the replacement panel using specialized hardware programmers. Face ID functionality is preserved by carefully transplanting the delicate upper sensor assembly without tearing the cryptographically paired flex ribbons.
How long does an iPhone screen repair or replacement take?
A standard modular iPhone screen replacement typically takes between thirty and forty-five minutes at a professional repair facility equipped with proper tools and in-stock parts. Glass-only refurbishment requires several hours due to the intricate cleaning, optical adhesive application, vacuum lamination, and autoclave curing stages. Most customers choose full assembly replacement for its rapid turnaround, allowing them to walk out with a restored phone on the same day.
Why are there vertical green or pink lines on my iPhone screen after a drop?
Vertical colored lines shooting across an iPhone display indicate internal hardware failure within the display driver integrated circuit or the micro-fine flexible printed circuit connections. This damage is caused by physical impact shock that fractures microscopic electrical traces carrying video data to the pixels. Because the underlying circuit matrix is broken, this issue cannot be fixed by exterior glass repair and requires a complete modular screen replacement.
Is it worth replacing the screen on an older iPhone?
Replacing the screen on an older iPhone is often highly economical compared to purchasing a brand-new smartphone. Standard LCD models like the iPhone 11 and iPhone SE can be restored for a fraction of their replacement cost, extending their usable lifespan for several additional years. For older OLED models, pairing a replacement screen with a fresh battery provides a like-new smartphone experience at substantial financial savings.
Need Fast & Reliable Device Repair in Washington, DC?
Don't let a cracked screen, dying battery, or faulty charging port slow you down. Our certified technicians provide same-day diagnostics and repairs using premium replacement parts backed by our comprehensive warranty.
Phone: (202) 478-4799 | Mon - Sat: 10:00 AM - 8:00 PM