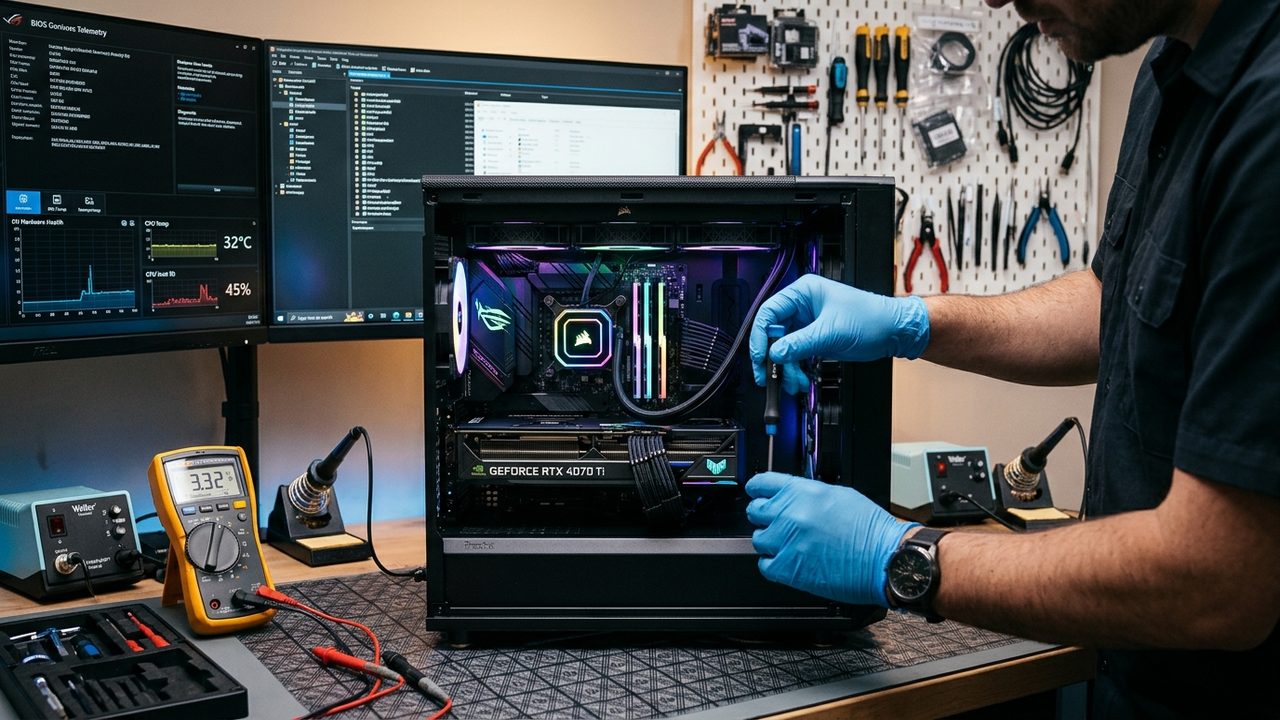
Few workplace or home disruptions are as abrupt and anxiety-inducing as a desktop computer failing mid-workflow. Whether you rely on a high-performance workstation for video editing, an office tower for business operations, or a dedicated gaming rig, a sudden refusal to turn on, unexpected blue screen crashes, or terrifying grinding noises can grind productivity to a complete halt. Fortunately, unlike modern glued-together ultrabooks and smartphones, desktop PCs feature a modular architecture designed specifically for component-level diagnostics, part replacement, and cost-effective restoration. In this definitive guide to desktop computer repair, our certified technicians break down the eight most common PC problems, their underlying engineering root causes, safe diagnostic walkthroughs, and practical solutions to get your system back to peak performance.
In This Comprehensive Desktop Repair Guide
- The Modular Advantage: Why Desktop Computers Are Highly Repairable
- Problem 1: Desktop Won’t Turn On At All (Zero Power, No LEDs, No Fans)
- Problem 2: Computer Powers On, But No Display / Black Screen (No POST)
- Problem 3: Random Restarts, Freezing & Blue Screen of Death (BSOD)
- Problem 4: Overheating, Thermal Throttling & Extremely Loud / Grinding Fans
- Problem 5: Storage Drive Failures & "No Boot Device Found" Errors
- Problem 6: Strange Clicking, Whining, Buzzing, or Burning Smells
- Problem 7: Peripheral & Connectivity Failures (Dead USB, Audio, Ethernet)
- Problem 8: Severe Operating System Corruption & Persistent Malware
- Master Desktop Troubleshooting & Diagnostic Decision Matrix
- Desktop Repair vs. Replacement: When Does Component Upgrading Make Sense?
- Preventative PC Maintenance: The 6-Month Longevity Protocol
- When to Seek Professional Desktop Repair at DC Phone Repair
The Modular Advantage: Why Desktop Computers Are Highly Repairable
In an era where consumer electronics increasingly favor soldered RAM, proprietary batteries, and tamper-resistant enclosures, desktop personal computers remain the pinnacle of repairable technology. A desktop PC is not a monolithic single device; it is a standardized ecosystem composed of discrete, swappable components interconnected through industry-standard protocols:
- Power Supply Unit (PSU): Converts high-voltage alternating current (AC) from your wall outlet into regulated low-voltage direct current (+12V, +5V, +3.3V) distributed through standard 24-pin, 8-pin EPS, PCIe, and SATA power cables.
- Motherboard: The central circuit backplane that houses the CPU socket, RAM DIMM slots, PCIe expansion lanes, chipset, VRM (Voltage Regulator Module) circuitry, and storage interfaces.
- Central Processing Unit (CPU): The computational brain, secured under a socket latch and covered by a thermal dissipation assembly.
- Random Access Memory (RAM): Modular DDR4 or DDR5 sticks plugged into keyed DIMM slots, enabling instant capacity expansions or single-module fault isolation.
- Dedicated Graphics Processing Unit (GPU): Pluggable PCIe expansion cards that handle visual rasterization, 3D rendering, and hardware-accelerated video compute.
- Storage Drives: M.2 NVMe solid-state drives secured by a single standoff screw or 2.5"/3.5" SATA SSDs and mechanical hard drives connected by detachable ribbon cables.
Because every subsystem communicates via standardized interfaces (ATX power standards, PCIe lanes, JEDEC memory timings, and UEFI firmware), a failure in one component rarely requires scrapping the entire computer. Effective desktop computer repair relies on methodical fault isolation—systematically testing each subsystem to pinpoint the defective link without replacing functional hardware.
Problem 1: Desktop Won’t Turn On At All (Zero Power, No LEDs, No Fans)
You press the power button on your computer tower, and absolutely nothing happens: no fans spin, no motherboard standby LEDs illuminate, and the power supply remains completely silent. A completely dead desktop is one of the most alarming symptoms a user can experience, but it is also one of the easiest to narrow down.
1. Upstream Electrical & Power Delivery Checks
Before disassembling the chassis, always eliminate external power variables. Modern desktop power supplies draw anywhere from 300 to 1,200 watts under peak compute loads, making them sensitive to upstream electrical anomalies:
- Wall Receptacle & Surge Protector: Verify the wall outlet has active power by plugging in a known working lamp or charger. Many surge protectors contain internal metal oxide varistors (MOVs) that sacrifice themselves during power surges, cutting off output without visibly tripping a switch.
- IEC Power Cable: Inspect the heavy-gauge C13/C14 power cord connecting the wall to the back of the computer. Test with an alternate kettle lead to rule out internal wire fractures.
- The Master Rocker Switch: Ensure the rocker switch located on the rear of the power supply unit is flipped to the
"I"(On) position, rather than the"O"(Off) position. While seemingly obvious, this switch is frequently bumped during cleaning or cable management.
2. Power Supply Unit (PSU) Failure
The PSU is subjected to high thermal and electrical stress. Over years of operation, electrolytic capacitors can dry out, internal fuse links can blow, or switching transistors can short-circuit. High-quality power supplies incorporate comprehensive safety protections—including Over Voltage Protection (OVP), Under Voltage Protection (UVP), Over Current Protection (OCP), and Short Circuit Protection (SCP). If any component on the motherboard develops a dead short to ground, the PSU will immediately trip its protection circuit and refuse to latch power on.
Professional Diagnostic Technique: The Paperclip Jump Test
Technicians isolate PSU health by disconnecting all power leads from the motherboard, GPU, and drives. Using an insulated wire or paperclip, short the green wire (Pin 16 -PS_ON#) to any adjacent black wire (Ground) on the main 24-pin ATX connector. If the power supply fan spins smoothly, the internal primary circuitry is alive; if the fan flinches and stops, or doesn't move at all, the PSU is defective and requires replacement.
3. Front Panel Power Switch & Motherboard Header Issues
The physical power button on your computer case is merely a momentary contact switch. When pressed, it briefly shorts two pins on the motherboard's Front Panel I/O header (marked PWR_SW or POWER BTN), signaling the motherboard's Super I/O chip to ground the power supply's PS_ON# rail. If the internal header wire is dislodged, crimped, or the switch mechanism fails, pressing the button does nothing. Technicians verify this by carefully bridging the two PWR_SW pins on the motherboard with a flathead screwdriver tip; if the PC instantly powers on, the case switch or wiring is faulty.
Problem 2: Computer Powers On, But No Display / Black Screen (No POST)
In this scenario, the computer sounds alive: fans spin up, internal RGB lighting glows, and hard drives spin, but the computer monitor reports "No Signal Input" and enters power-saving sleep mode. This indicates that the computer is failing to complete its POST (Power-On Self-Test) routine.
1. Understanding the POST Sequence
Every time an x86/x64 desktop boots, the motherboard UEFI/BIOS performs a lightning-fast hardware validation sequence in a strict chronological hierarchy:
- CPU Initialization: Validates processor voltage rails, clock frequencies, and core registers.
- DRAM Memory Training: Verifies memory controller communication, reads SPD profiles, and tests RAM addresses.
- VGA / GPU Initialization: Probes PCIe lanes, initializes the video framebuffer, and requests display handshake.
- Boot Device Handshake: Scans storage buses for valid UEFI boot partitions and hands over execution to the Windows Boot Manager.
If any single step in this sequence fails, the motherboard halts execution immediately to protect hardware, resulting in a black screen.
2. Reading Hardware Diagnostic Indicators
Modern motherboards feature built-in diagnostic systems to pinpoint precisely where POST execution halted:
- EZ Debug LEDs: Look through the chassis side panel for four illuminated LEDs labeled
CPU,DRAM,VGA, andBOOT. If the light stays stuck solidly onDRAM, memory training failed; if stuck onVGA, the graphics card or PCIe link is compromised. - Two-Digit Seven-Segment Q-Code Displays: High-end motherboards show alphanumeric hex codes (e.g.,
Code 55: Memory not installed,Code 00: CPU initialization error). - Motherboard Beep Codes: If a chassis piezo speaker is installed, audible beeps communicate error patterns (e.g., 1 long beep + 2 short beeps typically indicates a video subsystem failure on AMI BIOS).
3. Graphics Card (GPU) & Video Pipeline Fault Isolation
Graphics cards are among the heaviest and hottest components in a modern PC. Due to gravity and thermal expansion cycles, heavy GPUs can gradually sag or creep out of their PCIe x16 slots over time, breaking contact with microscopic gold interface pins. Safe troubleshooting includes:
- Display Cable Port Check: Confirm the monitor cable is plugged directly into the dedicated graphics card outputs lower down on the rear chassis, rather than the motherboard's video ports. Motherboard ports only function if your CPU possesses an integrated graphics processing unit (iGPU).
- Reseating the GPU: Unplug power, disconnect the PCIe 6/8-pin power leads, release the PCIe retention latch, clean the gold contact fingers with 99% isopropyl alcohol, and firmly reseat the card until the latch clicks locked.
- Testing Integrated Video: If the CPU features integrated graphics, remove the dedicated GPU entirely and plug your monitor directly into the motherboard. If the system boots cleanly, the dedicated GPU or its PCIe slot is defective.
Problem 3: Random Restarts, Freezing & Blue Screen of Death (BSOD)
Few computer symptoms are more frustrating than an operating system that boots normally, only to freeze solidly without warning or crash into a Windows Blue Screen of Death (BSOD) during normal multitasking, gaming, or office work. Understanding the anatomy of a BSOD is critical to resolving it.
| Windows Stop Code | Primary Engineering Cause | Recommended Repair Action |
|---|---|---|
CRITICAL_PROCESS_DIED | A fundamental Windows background process (e.g., csrss.exe, wininit.exe) unexpectedly terminated due to disk read failures or system corruption. | Check SSD health using S.M.A.R.T. telemetry, run sfc /scannow, inspect system drive cabling. |
MEMORY_MANAGEMENT | Hardware memory bit corruption, unstable XMP/DOCP overclock profile, or failing RAM address cells. | Execute comprehensive MemTest86 diagnostic; test RAM sticks individually in Slot 2. |
IRQL_NOT_LESS_OR_EQUAL | A kernel-mode driver attempted to access pageable memory at an invalid or elevated interrupt request level. | Clean-install GPU drivers using DDU (Display Driver Uninstaller); update chipset firmware. |
WHEA_UNCORRECTABLE_ERROR | Windows Hardware Error Architecture detected an uncorrectable hardware fault (CPU voltage droop, dying NVMe SSD, or motherboard VRM failure). | Inspect CPU temperatures, reset BIOS voltages to factory defaults, bench-test PSU voltage rails. |
PAGE_FAULT_IN_NONPAGED_AREA | System requested memory that was not found in nonpaged RAM pools—frequently caused by failing RAM, corrupted pagefile.sys, or failing antivirus filter drivers. | Isolate memory sticks; disable and rebuild Windows virtual memory paging file. |
Memory Fault Isolation: The Gold Standard Protocol
Random freezes and memory-related BSODs are overwhelmingly caused by RAM instability. To isolate a defective RAM module without specialized testing hardware:
- Power down the PC, unplug AC power, and ground yourself against electrostatic discharge (ESD).
- Remove all RAM sticks except a single module in primary DIMM Slot 2 (refer to your motherboard manual for the optimal single-channel slot).
- Boot into UEFI/BIOS and temporarily disable extreme overclocking profiles (Intel XMP or AMD EXPO/DOCP), enforcing standard JEDEC frequencies (e.g., 2133 MHz or 4800 MHz).
- Boot from a USB drive loaded with PassMark MemTest86. Allow it to run through 4 complete passes of algorithmic memory patterns. If even a single bit error is flagged, that RAM module is physically defective and must be replaced.
- Repeat this process individually for each memory stick to definitively isolate the failing module.
Problem 4: Overheating, Thermal Throttling & Extremely Loud / Grinding Fans
Desktops generate tremendous amounts of heat. Modern processors and graphics cards can consume over 250 to 450 watts under full computational load. If thermal energy is not swiftly evacuated from the silicon dies, the hardware triggers aggressive safety mechanisms: thermal throttling (dropping clock speeds to prevent physical destruction) and emergency thermal shutdowns (sudden complete power cutoffs once CPU die temps exceed 100°C–105°C).
1. The Thermal Interface Material (TIM) Degradation Timeline
Between the microscopic surface imperfections of your CPU's Integrated Heat Spreader (IHS) and the copper base of the cooler sits a thin layer of thermal compound. Over 2 to 4 years of continuous heating and cooling cycles, the liquid carriers inside thermal paste evaporate or suffer from "pump-out", leaving behind a brittle, chalky, non-conductive residue. Once this occurs, thermal resistance skyrockets, causing immediate overheating even during simple web browsing.
Step-by-Step Thermal Compound Reapplication:
- Carefully remove the CPU cooler mounting bracket. If an AIO liquid cooler or heavy air heatsink feels stuck to the CPU, gently twist it side to side before lifting to avoid pulling AMD PGA processors straight out of their locked sockets.
- Saturate a lint-free microfiber cloth with 99% pure Isopropyl Alcohol (IPA) and thoroughly clean both the CPU heat spreader and cooler base plate until the bare nickel/copper shines with zero residue.
- Apply a high-conductivity, non-conductive thermal paste (such as Arctic MX-6, Noctua NT-H2, or Thermal Grizzly Kryonaut). A pea-sized dot in the center or a subtle 'X' pattern provides uniform, bubble-free spread under mounting pressure.
- Torque the cooler mounting screws in a cross/diagonal pattern evenly to ensure uniform clamping pressure across the silicon die.
2. Liquid AIO (All-In-One) Cooler Failures
Closed-loop liquid coolers provide exceptional thermal dissipation when new, but they introduce unique electro-mechanical failure vectors that air coolers do not have:
- Pump Impeller Failure: The miniature electric water pump inside the CPU block runs continuously. Over time, bearings seize, electrical coils fail, or air bubbles become trapped in the pump cavity. If the pump tachometer reports
0 RPMin BIOS, or if the radiator tubes feel drastically different in temperature (one scalding hot, the other completely cold), the pump is dead and the entire unit must be replaced. - Coolant Permeation & Sludge Clogging: Over years of operation, microscopic amounts of liquid permeate through rubber tubing walls. In low-cost liquid coolers, mixed-metal corrosion (copper coldplate interacting with an aluminum radiator) can create internal chemical galvanic corrosion, producing microscopic sludge that clogs the micro-fins, completely halting coolant circulation.
3. Mechanical Fan Bearing Failure
Desktop case fans utilize three primary bearing types: sleeve bearings, dual ball bearings, and fluid dynamic bearings (FDB). High-pitched screeching, rhythmic clicking, or rattling sounds indicate that bearing lubrication has depleted, allowing the fan shaft to wobble against its housing. When a bearing fails, the motor draws excess amperage and spins far below its rated RPM, diminishing airflow while creating unbearable noise. Replacing worn 120mm or 140mm PWM case fans is quick, affordable, and dramatically improves case thermals.
Problem 5: Storage Drive Failures & "No Boot Device Found" Errors
Turning on your PC and encountering an American Megatrends screen with "Reboot and Select proper Boot device" or an automatic redirect into the BIOS utility means your system can no longer detect or read the master operating system drive. Storage failures represent the highest data-loss risk in desktop computing.
1. Mechanical Hard Drive (HDD) Failure Modes
Traditional spinning hard disk drives contain glass or aluminum platters spinning at 5,400 to 7,200 RPM while microscopic magnetic read/write heads float just nanometers above the surface on an air cushion. Mechanical failure signs include:
- The "Click of Death": A rhythmic, repeating metallic click or tap repeated every second. This sound occurs when the actuator arm swings out over the platter, fails to read the servo timing tracks or boot sectors, and snaps back to the home parking ramp in an endless loop.
- High Bad Sector Counts: Microscopic magnetic degradation creates read errors. The drive's internal firmware reallocates these sectors to spare tracks until the reallocation pool is exhausted, leading to catastrophic data loss.
- High-Pitched Bearing Whine: The spindle motor bearing seizes, preventing the platters from reaching operational rotational velocity.
2. Solid-State Drive (SSD) Failure Modes
While NVMe and SATA solid-state drives have no moving parts, they are susceptible to electronic degradation:
- Flash NAND Wear-Out: Every flash memory cell has a finite number of Program/Erase (P/E) write cycles. When endurance thresholds are reached, the memory cells lose their ability to reliably hold electrical charge.
- SSD Controller Panic (Read-Only Lock): When the SSD's flash controller detects critical NAND degradation, defective voltage tables, or corrupt firmware metadata, it locks the drive into an emergency hardware Read-Only failsafe mode to protect existing data from further corruption. In some cases, the drive vanishes from the PCIe bus entirely, reporting a generic capacity of
0 MBor a raw controller name in BIOS (e.g., "SandForce Generic Drive").
3. Upgrading from Legacy HDD to Modern NVMe SSD: The Ultimate Desktop Revival
If your desktop is still booting from a mechanical hard drive, it is artificially constrained by a severe data throughput bottleneck. A traditional 7,200 RPM hard drive delivers approximately 100 to 140 MB/s of sequential read speeds and a dismal 75 to 100 IOPS (Input/Output Operations Per Second) for random 4K reads. By comparison, modern PCIe Gen 4 NVMe M.2 SSDs achieve over 5,000 to 7,400 MB/s with up to 1,000,000 IOPS. Migrating your Windows installation to a high-speed SSD delivers instant boot times, seamless application launches, and makes a 5-year-old desktop feel noticeably faster than brand-new factory budget towers.
Problem 6: Strange Clicking, Whining, Buzzing, or Burning Smells
A properly operating desktop computer should emit a gentle, consistent whoosh of air through its ventilation grilles. When unexpected auditory or olfactory symptoms arise, your computer is signaling an acute mechanical or electrical hazard.
1. High-Frequency Coil Whine: Annoying But Non-Harmful
A piercing, high-pitched electrical buzz, squeal, or hiss that changes pitch depending on what is displayed on the screen (such as loading a 3D video game or rendering complex 4K timeline graphics) is almost always coil whine. Inside high-power graphics cards and power supplies, copper inductors regulate raw electricity. When massive electrical current pulses through these chokes at thousands of hertz, magnetic fields cause the wire coils to physically vibrate against their ferrite casings at audible frequencies. While irritating, coil whine causes zero hardware damage and does not impact system longevity.
2. Dangerous Electrical Arcing & The Ozone / Burning Smell
If your PC emits an acrid smell resembling burned plastic, chemical fish, or electrical ozone, immediately unplug the AC power cord from the wall outlet. Do not wait for a formal Windows shutdown.
- Melted 12VHPWR / PCIe Connectors: Modern ultra-high-wattage graphics cards require flawless connector seating. If a high-draw power connector is even slightly misaligned or bent at a sharp 90-degree angle close to the plug, electrical resistance surges, creating localized temperatures exceeding 150°C that can melt plastic connectors and start electrical fires.
- Blown Electrolytic Motherboard Capacitors: Older motherboards or cheap power supplies utilize liquid electrolyte capacitors. When overstressed, internal pressure causes the aluminum top can to bulge, rupture along its scored vent lines, and release conductive electrolyte liquid with a distinct bitter chemical odor.
Problem 7: Peripheral & Connectivity Failures (Dead USB, Audio, Ethernet)
When external devices suddenly stop responding—such as wireless mouse lag, USB flash drives disconnecting during file transfers, crackling headphone audio, or dropped internet connectivity—the issue typically tracks back to physical port damage or bus contention.
1. Physical USB Port Short Circuits
Because USB ports on computer towers are exposed and frequently subjected to repeated insertions, internal plastic alignment tongues can snap. When this occurs, the four or nine thin metallic contact pins bend inward and contact the outer metal grounded shield. When power is applied, the motherboard's 5-volt standby rail dead-shorts directly to chassis ground. Most modern motherboards detect this short and trigger an automatic protective shutdown within 5 to 15 seconds, flashing a BIOS warning: "USB Device Over Current Status Detected! System Will Shut Down After 15 Seconds." Inspecting every front and rear USB port with a flashlight for mangled pins is an essential desktop repair diagnostic.
2. Front Panel I/O vs. Rear Motherboard Backplate Differences
Always test unresponsive peripherals by plugging them directly into the motherboard's rear I/O shield ports on the back of the tower, rather than the case's top or front panel ports. Front panel ports rely on unshielded internal extension cables snaking past high-EMI components (power cables, graphics cards, and fans) to reach headers on the motherboard. These internal cables can easily dislodge, become degraded, or introduce signal attenuation.
Problem 8: Severe Operating System Corruption & Persistent Malware
Not every desktop computer failure stems from damaged silicon or broken copper traces. Software-level corruption can mimic catastrophic hardware failure with terrifying accuracy.
1. Hidden Cryptominers & Background Resource Hijackers
Modern malware rarely announces itself with flashy pop-ups or sirens; instead, modern cyber threats operate with calculated stealth. Trojanized utility installers, pirated software cracks, and malicious browser extensions frequently deposit crypto-mining payloads. These miners run silently in the background, utilizing 100% of your desktop's GPU compute and CPU threads whenever the user is away from the keyboard, causing severe lag, jet-engine fan speeds, high electricity bills, and premature component degradation. Inspecting the Windows Task Manager (Performance tab) and checking for unexplained high GPU/CPU utilization at idle is an indispensable first step.
2. Repairing Windows Core File Integrity (DISM & SFC)
When unexpected power outages, forced hard reboots, or disk write errors corrupt Windows core system files, the operating system can enter an unstable loop. Before considering a destructive OS reinstallation, technicians execute Microsoft's native command-line repair utilities in an elevated Administrator PowerShell prompt:
# Step 1: Scan and repair the Windows Component Store image from online Microsoft servers
DISM /Online /Cleanup-Image /RestoreHealth
# Step 2: Verify and replace damaged protected system files with clean cached copies
sfc /scannow
Master Desktop Troubleshooting & Diagnostic Decision Matrix
When troubleshooting an unresponsive desktop PC, consult this technician decision matrix to rapidly match symptoms to their verified root causes and targeted repair interventions:
| Observed Symptom | Probable Root Cause | Diagnostic Verification | Definitive Repair Action |
|---|---|---|---|
| Zero Power, No Fans, No Lights | Tripped PSU, dead power supply, shorted motherboard 12V rail, or broken front panel switch. | Paperclip jump test on 24-pin ATX lead; screwdriver bridge on PWR_SW motherboard pins. | Replace PSU; repair shorted motherboard VRMs or swap damaged power switch. |
| Fans Spin Full Speed, Screen Remains Black | Failed POST sequence: unseated RAM, bad GPU contact, unseated PCIe power, or corrupted BIOS. | Check motherboard EZ Debug LEDs; reseat single RAM stick in Slot 2; test integrated video output. | Clean RAM contacts with 99% IPA; reseat GPU; perform CMOS battery reset / BIOS flashback. |
| Random BSODs During Light Usage | Failing memory cell, unstable XMP timing profile, or corrupted system drivers. | Run PassMark MemTest86 for 4 passes; analyze Minidump files with WinDbg / BlueScreenView. | Replace defective RAM stick; disable unstable memory overclocks; clean-install certified drivers. |
| PC Shuts Down Abruptly While Gaming or Rendering | CPU/GPU thermal throttling past 100°C; seized AIO pump; inadequate PSU wattage under transient spikes. | Monitor real-time temperatures using HWInfo64 or Core Temp; verify AIO pump RPM in BIOS. | Thorough dust cleaning; apply fresh thermal paste; replace failed cooler or upgrade to higher-tier PSU. |
| "Reboot and Select Proper Boot Device" | Disconnected SATA cable, corrupted Windows BCD boot sector, or dead SSD/HDD controller. | Check if drive is recognized in BIOS device tree; verify NVMe M.2 seating; run CrystalDiskInfo. | Rebuild BCD via Windows Recovery USB; replace failing drive and clone/reinstall Windows. |
Desktop Repair vs. Replacement: When Does Component Upgrading Make Sense?
One of the most frequent questions our service advisors receive is: "Is my desktop worth fixing, or should I invest in a completely new computer?" Because desktops are modular, they follow vastly different economic rules than all-in-one PCs or laptops.
The 50% Rule and Platform Viability
A dependable industry benchmark is the 50% Rule: If the total cost of parts and labor to restore your desktop exceeds 50% of the replacement cost of a brand-new, modern system offering equivalent or superior compute performance, replacement is typically the smarter financial investment. However, determining value requires assessing platform viability:
- Highly Worth Repairing: Systems running on modern DDR4 or DDR5 platforms (such as AMD AM4/AM5 or Intel LGA 1200/1700 sockets). If your motherboard, power supply, or graphics card fails on an AMD Ryzen 5000/7000 or Intel 12th/13th/14th Gen system, swapping the single defective component restores 100% of the computer's capability for a fraction of the cost of a new build.
- High-ROI Component Upgrades: If an older desktop feels sluggish, replacing a dying mechanical HDD with a 1TB SATA SSD ($60–$90) and expanding memory from 8GB to 16GB ($35–$50) typically extends the computer's productive lifespan by 3 to 5 years at an unbeatable cost-per-year ratio.
- When Replacement Makes Sense: Older systems utilizing legacy DDR3 memory (such as Intel 2nd, 3rd, or 4th Gen Core processors from 2011–2014) that suffer motherboard failures. Because replacement motherboards for discontinued sockets are only available as aging, expensive second-hand parts with no warranty, investing substantial capital into an obsolete platform is rarely cost-effective.
Preventative PC Maintenance: The 6-Month Longevity Protocol
The overwhelming majority of catastrophic hardware failures—blown capacitors, seized cooling fans, burned thermal paste, and thermal throttling—can be prevented through simple, regular maintenance. Implement this 6-month protocol to keep your desktop operating smoothly for years:
- Perform Compressed Air De-Dusting: Power off the PC, take the tower to a well-ventilated area or garage, and remove the side panels. Using a dedicated high-velocity electric electronics duster or cans of compressed air, blow dust out of intake filters, radiator fins, graphics card fans, and the power supply shroud. Crucial Tip: Always physically hold fan blades with a finger or wooden stick while spraying compressed air; allowing fans to free-spin at high velocity generates back-EMF voltage that can fry motherboard fan headers and destroy fan bearings.
- Verify Case Fan Airflow Orientation: Ensure intake fans (drawing cool air in through front and bottom mesh) and exhaust fans (evacuating hot air out the rear and top) are balanced to maintain positive internal air pressure, preventing dust from entering unfiltered chassis cracks.
- Inspect Cable Management: Secure loose cables away from spinning fan blades using Velcro ties. Bundled cables prevent airflow turbulence and make future component swaps seamless.
- Utilize a High-Quality Battery Backup (UPS): Protect your desktop's sensitive power supply and data drives from power surges, blackouts, and electrical brownouts by plugging into a True Sinewave Uninterruptible Power Supply (UPS). A UPS gives you enough runtime during power outages to safely shut down Windows without file system corruption.
When to Seek Professional Desktop Repair at DC Phone Repair
While basic cable checks, dust cleaning, and software diagnostics are great DIY projects, certain desktop issues require specialized bench equipment, micro-soldering capabilities, and dedicated diagnostic hardware:
- Advanced Component-Level Board Diagnostics: Detecting shorted surface-mount capacitors, blown MOSFETs, or burnt traces on multi-layer motherboards using thermal imaging cameras and benchtop power supplies.
- Critical Storage Failure & Emergency Data Recovery: Recovering irreplaceable family photos, corporate accounting databases, or creative project files from failing mechanical drives with damaged read heads or locked NVMe controllers in a certified environment.
- Complex Liquid Cooling Overhauls: Flushing, refilling, pressure-testing, and diagnosing custom water cooling loops, or replacing seized AIO coolers with premium non-conductive thermal interfaces.
- Certified Hardware Warranty & Turnaround: Accessing genuine replacement components backed by professional service warranties and rapid turnaround times.
Need Fast & Reliable Device Repair in Washington, DC?
Don't let a cracked screen, dying battery, or faulty charging port slow you down. Our certified technicians provide same-day diagnostics and repairs using premium replacement parts backed by our comprehensive warranty.
Phone: (202) 478-4799 | Open Daily: 10:00 AM - 10:00 PM