Nintendo Switch Repair Guide: Top 10 Common Issues
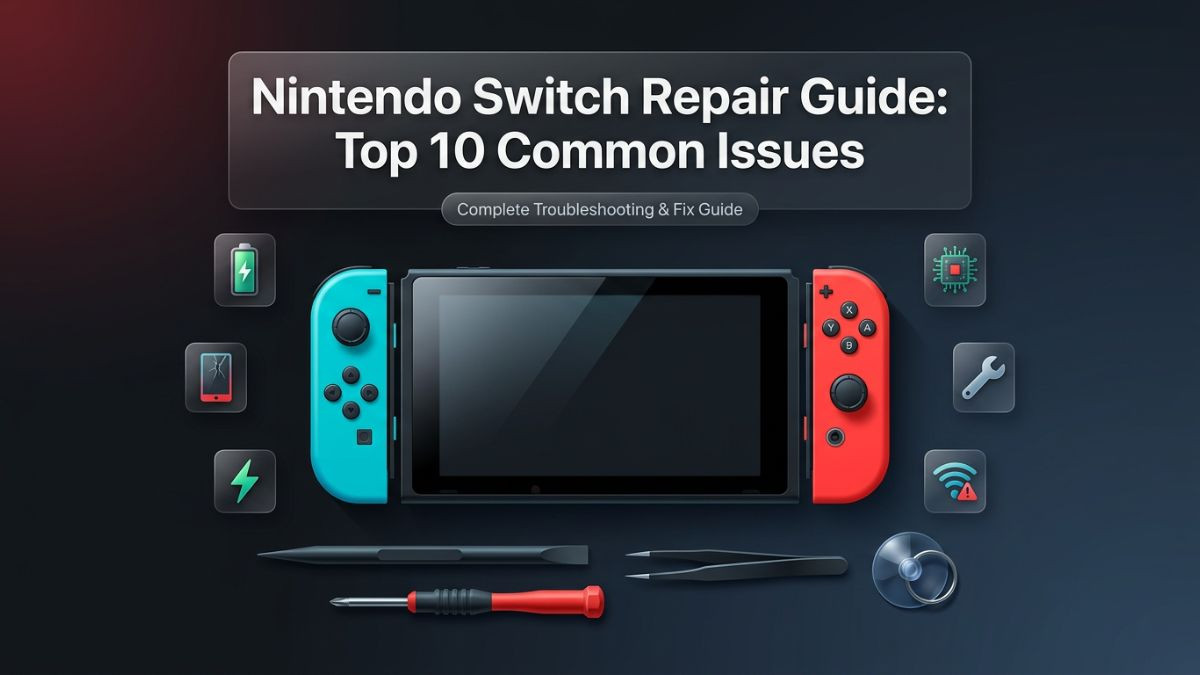
Nintendo Switch Repair Guide: Top 10 Common Issues
Nintendo Switch is one of the most versatile gaming consoles ever made. Its ability to transition seamlessly between a home console and a handheld device has made it a household favorite since its launch, and millions of units remain in active daily use across the world. That versatility, however, also means the Switch is handled, transported, and used in far more demanding conditions than a traditional living room console. It gets dropped, stuffed into bags, charged with third-party accessories, and played for hours in environments that are far from ideal.
The result is a device that, despite its solid engineering, is prone to a specific and well-documented set of problems. This nintendo switch repair guide covers the ten most common issues that Switch owners encounter, explaining what causes each problem, how to identify it, what can be done at home, and when a professional gaming console repair service is the right call. Whether you own the original Switch, the Switch Lite, or the Switch OLED, this guide gives you the information needed to make smart, informed repair decisions.
Issue 1: Nintendo Switch Joy-Con Drift
Joy-Con drift is arguably the most well-known and widely reported problem in Nintendo Switch history. It describes a situation where one or both analog sticks register movement on screen even when the user is not touching them. Characters walk in random directions, menus scroll on their own, and aiming becomes unreliable. For competitive or precision gaming, drift makes the console nearly unusable.
The root cause lies inside the analog stick module itself. The sticks use a small potentiometer — a resistive sensor — that wears down over time with regular use. As the conductive material degrades, the sensor begins misreading the stick's resting position as a directional input. Nintendo has faced significant criticism and legal action over this design, and while the company has offered free Joy-Con repairs in several markets, many users still encounter the problem outside of warranty periods.
How to identify Joy-Con drift:
Open any game and leave the analog sticks completely untouched. If the camera moves, the character walks, or any on-screen element shifts without input, drift is present. You can also test through System Settings by navigating to Controllers and Sensors, then Test Input Devices, and then Calibrate Control Sticks. A drifting stick will show movement in the calibration display even when untouched.
DIY fix options:
The most accessible first step is to use compressed air around the base of the analog stick. Dust and debris lodged beneath the stick cap can sometimes mimic drift symptoms. Hold the can upright, press the stick gently in the opposite direction of the drift, and blow short bursts of air around the gap. This does not fix mechanical wear but can resolve debris-related false inputs.
Some users apply a small amount of electrical contact cleaner beneath the stick cap using a cotton swab or precision applicator. This can temporarily lubricate and clean the potentiometer contacts. Results vary and the fix rarely lasts permanently, but it buys time before a full replacement is needed.
The permanent solution is replacing the analog stick module entirely. Replacement sticks are widely available and cost between $5 and $15 per stick. The repair requires a tri-wing Y00 screwdriver, a Phillips PH00 screwdriver, plastic pry tools, and patience. The Joy-Con shell must be opened, the ribbon cables disconnected carefully, and the stick module unsoldered or unclipped depending on the revision. For users unfamiliar with electronics disassembly, this is where how to fix nintendo switch joy cons tutorials can be helpful — but the risk of tearing a ribbon cable is real, and a professional repair is often the safer choice.
| Fix Method | Cost | Permanence | Risk Level |
|---|---|---|---|
| Compressed air cleaning | $0 | Temporary | None |
| Contact cleaner application | $5–$10 | Short-term | Low |
| Stick recalibration (software) | $0 | Temporary | None |
| DIY analog stick replacement | $5–$20 | Permanent | Moderate |
| Professional Joy-Con repair | $30–$60 | Permanent | None |
Issue 2: Nintendo Switch Not Turning On
A Nintendo Switch that refuses to power on is one of the most alarming issues a user can face. The screen stays black, no logo appears, and pressing the power button produces no response. Before assuming the worst, it helps to understand the range of causes behind this symptom, because many of them are straightforward to resolve.
The most common cause is complete battery depletion. Unlike some devices that power on briefly even with near-zero charge, the Switch requires a minimum threshold of power before it will boot. If the battery has been fully drained — especially over a long storage period — the console may appear completely dead. The fix is simple: connect the Switch to its official charger or dock and leave it for at least 30 to 60 minutes before attempting to power it on. A faint charging indicator on the screen after a few minutes confirms the battery is receiving power.
If the console does not respond to charging, the issue may lie with the charging port, the charger itself, or the battery. Trying a different official Nintendo charger or USB-C cable is a logical next step. Third-party chargers — particularly cheap, uncertified ones — have been documented to cause power management issues in the Switch, including preventing the console from charging correctly. Damage from a faulty charger can, in severe cases, affect the charging IC chip on the motherboard.
A forced restart is worth attempting before any hardware investigation. Hold the power button for 12 to 15 seconds until the console fully shuts down, then press it once to restart. This resolves the issue when a software crash or deep freeze has locked the system in a non-responsive state.
If none of these steps work, the problem may involve a failed battery, a damaged USB-C charging port, or a motherboard-level fault. At this point, professional diagnosis from a qualified nintendo switch repair service is the appropriate path. Opening the console without the right tools can cause additional damage, and motherboard repairs in particular require microsoldering skills that are beyond most DIY attempts.
Issue 3: Nintendo Switch Charging Port Repair
The USB-C port on the Nintendo Switch is the single point of contact for both charging and docked play through the dock's USB-C connection. It is also one of the most physically stressed components on the entire console. Every time the Switch is docked or connected to a charger, the port experiences mechanical stress. Over months and years of use, this stress can loosen the port from the motherboard, bend the internal pins, or cause the port to fail entirely.
Symptoms of a failing charging port include the console charging intermittently, only charging at certain angles, not charging at all despite the cable being fully inserted, or the dock failing to recognize the console. The nintendo switch usb c port repair is one of the most common professional repairs performed on this console, and it is also one of the most frequently misdiagnosed — users often assume a battery issue when the port is actually the culprit.
Diagnosing port vs. battery issues:
If the Switch charges wirelessly through a third-party Qi charger (not a standard Nintendo feature, but possible on some modified units) or charges inconsistently depending on cable angle, the port is almost certainly the issue. If the console shows zero response regardless of cable, angle, or charger used, both the port and battery should be investigated.
The nintendo switch charging port repair involves desoldering the damaged port from the motherboard and soldering a new one in its place. This is a microsoldering job. The USB-C connector has very small contact points, and improper soldering can bridge connections and cause permanent motherboard damage. This repair should not be attempted without a proper soldering station, flux, and direct experience with surface-mount component work. Professional gaming device repair experts perform this repair regularly and typically complete it within a few hours.
Repair cost for a USB-C port replacement at a professional shop generally falls between $50 and $100 depending on labor rates and the extent of the damage. If the port failure has caused downstream damage to the charging management circuitry, costs can be higher.
Issue 4: Nintendo Switch Black Screen Fix
A black screen on the Nintendo Switch can occur in several distinct forms — the screen stays completely dark after powering on, the screen goes black mid-session, or the console appears to be running (sounds play, button inputs register) but the display shows nothing. Each pattern points to a different underlying cause.
The simplest explanation is a brightness issue. If the screen was accidentally set to minimum brightness before the session ended, the display may appear off even when the console is fully functional. Press and hold the Home button to open the Quick Settings overlay — you should hear the system sounds — and increase brightness from there. This is surprisingly common and easily overlooked.
A more serious cause is a failed or damaged LCD or OLED display. Physical impacts, especially drops, can damage the display panel internally without cracking the outer glass. The backlight may fail, or the LCD layer may develop dead sections that render the entire screen dark. Nintendo switch lcd replacement or nintendo switch oled repair is the appropriate solution in these cases. Display replacements require careful disassembly, ribbon cable disconnection, and precise panel alignment during reassembly.
Software-related black screens can also occur after failed system updates or corrupted firmware. If the console was interrupted during an update — due to power loss or a crash — it may become stuck in a partial boot state with a blank display. Nintendo provides a recovery mode that can be accessed by holding the volume up and volume down buttons simultaneously while pressing power. From recovery mode, the system update can be redownloaded and applied correctly.
If the screen is confirmed dead and the console otherwise functions correctly when connected to a TV through the dock, the display panel itself has failed and a physical screen replacement is required. For the nintendo switch screen replacement on standard and OLED models, professional repair is strongly recommended due to the precision required and the cost of the replacement panels.
Issue 5: Nintendo Switch Overheating Issue
Heat management is a genuine challenge for the Nintendo Switch. The console packs significant processing power into a compact form factor, and the cooling system — a single small fan and a copper heat pipe — works hard to maintain safe temperatures. Under demanding conditions, the system can overheat, triggering thermal throttling, sudden shutdowns, or sustained fan noise that signals the cooling system is working at its limit.
The nintendo switch overheating issue most commonly appears during intensive gaming sessions, particularly with demanding titles like The Legend of Zelda: Breath of the Wild, Pokemon Scarlet and Violet, or Metroid Dread. Playing in handheld mode in a warm environment, or leaving the console in direct sunlight, compounds the thermal challenge significantly.
The most frequent physical cause of overheating in older Switch units is dust accumulation inside the cooling system. The fan draws air through ventilation slots and over a heatsink, and over time, lint and dust build up between the fan blades and on the heatsink fins. This insulates the heat-generating components and reduces the cooling system's effectiveness dramatically. The nintendo switch fan noise fix and overheating solution often involves the same repair: internal cleaning of the fan and heatsink.
Opening the Switch to clean the cooling system is a moderately involved process. The back cover must be removed, the fan disconnected and lifted, and the heatsink carefully cleaned with compressed air and isopropyl alcohol. The thermal paste between the processor and heatsink also dries out over time, losing its ability to transfer heat efficiently. Replacing it with fresh high-quality thermal compound is a key step in a thorough overheating repair.
Warning signs of a serious overheating problem:
- The console shuts down unexpectedly during normal gameplay
- The fan runs continuously at full speed even during light tasks
- The rear of the console feels uncomfortably hot to the touch
- Performance drops noticeably during graphically intensive scenes
If the console continues overheating after cleaning and thermal paste replacement, the fan itself may have failed or degraded. Fan replacement is a relatively affordable repair at most gaming console repair services and resolves the issue reliably.
Issue 6: Nintendo Switch Water Damage Repair
The Nintendo Switch is not water-resistant. Neither the standard model nor the Lite carries any IP rating for water or moisture protection, and even the OLED model is not sealed against liquid ingress. Accidental spills, exposure to rain, or use in humid environments can cause immediate or delayed damage to internal components.
Water damage in electronics is deceptive. A console that appears to function normally immediately after getting wet may develop failures over the following days or weeks as minerals in the water deposit on circuit board contacts and cause corrosion. This is why the standard advice for any water-damaged electronic device is to power it off immediately, remove any connected accessories, and not attempt to turn it on again until it has been professionally assessed.
The nintendo switch water damage repair process involves opening the console, removing all accessible components, and cleaning the circuit board with isopropyl alcohol at 90 percent concentration or higher using a soft brush. The goal is to remove mineral deposits and prevent further corrosion. In more severe cases, ultrasonic cleaning — a professional process that uses high-frequency sound waves in a cleaning solution — is used to reach deposits in microscopic gaps between components.
Corrosion damage to specific chips or traces on the motherboard may require microsoldering repairs to bridge broken connections or replace damaged ICs. Success rates for water damage repair depend heavily on how quickly the device is brought in, what type of liquid caused the damage, and the extent of the internal corrosion. Clean water damage treated quickly has a reasonable recovery rate. Saltwater, sugary drinks, or moisture left untreated for days produces much more challenging scenarios.
The rice method — placing a wet device in dry rice — is widely shared but largely ineffective. Rice does not absorb moisture fast enough or completely enough to prevent corrosion, and the delay it causes while the user waits for results often allows corrosion to advance significantly. Getting the console to a professional nintendo switch repair service as quickly as possible is always the better approach.
Issue 7: Nintendo Switch Game Card Reader Repair
The game card slot on the Nintendo Switch is a spring-loaded mechanical reader that accepts the proprietary game cartridges. Over time and with repeated cartridge insertions, the reader pins wear down, the spring mechanism weakens, or debris accumulates inside the slot. The result is a console that cannot read physical game cards, displays the "No game card inserted" error when a cartridge is present, or reads cards intermittently.
Before assuming the reader has failed, check the game cartridges themselves. Dirty contacts on a cartridge can produce the same error as a failed reader. Clean the gold contacts on the bottom of the cartridge with a cotton swab lightly dampened with isopropyl alcohol and allow them to dry before reinserting. Try multiple different cartridges to confirm whether the issue is isolated to one game or affecting all physical media.
Compressed air directed into the card slot can dislodge dust or debris that is preventing proper contact between the cartridge and the reader pins. Hold the console with the slot facing down while doing this to encourage loose debris to fall out rather than further in.
If cleaning does not resolve the problem, the nintendo switch game card reader repair involves replacing the reader module entirely. The reader is a discrete component connected to the motherboard via a ribbon cable, making replacement accessible without advanced soldering skills — though precise handling of the ribbon cable connector is still required. Replacement reader modules are available for roughly $10 to $20, and the full repair at a professional shop typically costs $40 to $80 including labor.
Issue 8: Nintendo Switch Wi-Fi Connectivity Issue and Audio Problems
Wireless connectivity problems on the Nintendo Switch range from the console failing to detect any Wi-Fi networks, to connecting but dropping the signal repeatedly, to showing slower-than-expected download and upload speeds. The nintendo switch wifi connectivity issue can be caused by software configuration errors, router compatibility conflicts, physical antenna damage, or in rare cases, a faulty wireless module.
Troubleshooting steps for Wi-Fi issues:
Start with the basics. Restart both the Switch and the router. Confirm the console is within reasonable range of the router and that other devices connect successfully to the same network. Navigate to System Settings, then Internet, and then Internet Settings to confirm the correct network is selected and that no proxy settings are conflicting with the connection.
If the Switch connects to Wi-Fi but experiences slow speeds or frequent drops, interference from neighboring networks may be the issue. Switching the router to a 5GHz band (if the Switch supports it — the standard model supports both 2.4GHz and 5GHz) can reduce interference. Changing the Wi-Fi channel on the router can also help in congested environments.
For the nintendo switch audio problem fix, the most common issues are no sound from the speakers during handheld play, crackling or distorted audio, or audio only playing through headphones even when none are connected. The last symptom — audio stuck in headphone mode — is caused by debris or lint lodged in the headphone jack, tricking the console into thinking headphones are constantly inserted. Careful cleaning of the 3.5mm jack with a toothpick or compressed air often resolves this immediately.
Speaker failures — where one or both speakers produce no sound or distorted sound — typically result from physical damage or manufacturing fatigue. Speaker replacement is a straightforward repair at most shops and costs between $20 and $50 depending on the model.
| Connectivity / Audio Issue | Likely Cause | Recommended Action |
|---|---|---|
| No Wi-Fi networks detected | Antenna damage or software bug | Restart, update firmware, professional check |
| Drops connection frequently | Interference or router conflict | Change Wi-Fi channel, update router firmware |
| Slow download speeds | Network congestion or 2.4GHz band | Switch to 5GHz, restart router |
| No speaker audio | Speaker failure or software mute | Check volume, test audio, speaker replacement |
| Audio only through headphones | Debris in headphone jack | Clean 3.5mm jack with compressed air |
| Crackling or distorted audio | Damaged speaker membrane | Speaker replacement |
Issue 9: Nintendo Switch Freezing Issue and Software Problems
The nintendo switch freezing issue manifests in several ways — the console hangs mid-game and becomes completely unresponsive, the home menu fails to load, games crash repeatedly at specific points, or the system update process stalls indefinitely. While frustrating, most freezing and software-related problems are solvable without any hardware repair.
A forced restart — holding the power button for 12 to 15 seconds — is the immediate response to any freeze. This performs a hard shutdown and clears the current system state. In most cases, the console will boot normally afterward. If freezes happen repeatedly, the issue needs further investigation.
Corrupted game data is a common cause of game-specific crashes. Navigate to System Settings, then Data Management, then Manage Software, and select the affected game. Choose the option to check for and repair corrupted data. The system will re-download any damaged files from Nintendo's servers, which typically resolves crashes tied to a specific title.
System-wide freezes — where multiple games crash or the home menu itself becomes unstable — may indicate corrupted system firmware. Initializing the console (a factory reset) resolves firmware-level corruption but erases all locally stored data. Ensure a Nintendo Switch Online backup is active before this step.
The nintendo switch software issues that require hardware investigation are those where freezing persists after a factory reset and reinstallation of games. Persistent freezing on a clean system can point to failing storage (the internal NAND flash memory), RAM issues, or motherboard instability — all of which require professional assessment and potentially nintendo switch motherboard repair.
Nintendo switch motherboard repair is the most complex and expensive category of Switch repair. Issues like failed NAND storage, damaged RAM chips, or broken voltage regulators require microsoldering skills and specialized diagnostic equipment. Not all repair shops offer motherboard-level work — look specifically for gaming device repair experts who list board-level repairs among their services.
Issue 10: Nintendo Switch Battery Replacement and Power Button Issues
Battery degradation is inevitable in any lithium-ion-powered device, and the Nintendo Switch is no exception. Over hundreds of charge cycles, the battery's capacity to hold a full charge diminishes. A Switch that once delivered five to nine hours of handheld gameplay may begin struggling to last two or three hours on a full charge. The device may also begin shutting off unexpectedly at higher battery percentages, or the battery percentage indicator may jump erratically during use.
The nintendo switch battery replacement is a moderately involved DIY repair but is more accessible than many other Switch repairs because the battery connects to the motherboard via a standard connector rather than being soldered directly. The process involves removing the back cover, carefully peeling the battery from its adhesive mount, disconnecting the battery connector, and installing the new battery in reverse order. Replacement batteries are available from reputable suppliers for $15 to $35, and professional battery replacement services typically cost between $50 and $90.
The nintendo switch power button fix addresses a different but related issue — a power button that has become stiff, unresponsive, or requires multiple presses to register. This is typically caused by debris ingress around the button mechanism or, in some cases, the button's flex cable developing a fault. Cleaning around the power button with compressed air can resolve debris-related stiffness. A faulty flex cable requires replacement, which is a straightforward repair at a qualified shop.
For the Switch Lite specifically, the nintendo switch lite repair for battery and power issues follows the same general process but with a slightly different internal layout due to the Lite's fully integrated design — there are no removable Joy-Cons, which means the shell configuration is different and requires a different disassembly sequence.
| Repair Type | DIY Difficulty | Average DIY Cost | Professional Cost | Turnaround |
|---|---|---|---|---|
| Joy-Con drift fix | Moderate | $10–$25 | $30–$60 | Same day possible |
| Screen replacement | High | $40–$80 | $80–$150 | 1–2 days |
| Battery replacement | Moderate | $15–$35 | $50–$90 | Same day possible |
| Charging port repair | Very High | Not recommended | $50–$100 | 1–2 days |
| Water damage repair | Not recommended | — | $80–$200+ | 2–5 days |
| Game card reader | Moderate | $10–$25 | $40–$80 | Same day possible |
| Fan/overheating fix | Moderate | $5–$20 | $40–$70 | Same day possible |
| Motherboard repair | Expert only | — | $100–$300+ | 3–7 days |
| Wi-Fi module repair | High | $10–$30 | $50–$100 | 1–2 days |
| Speaker replacement | Moderate | $10–$20 | $20–$50 | Same day possible |
DIY Nintendo Switch Repair vs. Professional Repair: Which Is Right for You?
Understanding when to attempt a repair yourself and when to hand the device to a professional is one of the most important decisions a Switch owner can make. Attempting the wrong repair without the right tools or experience can turn a $50 fix into a $200 problem.
DIY nintendo switch repair makes sense in specific, limited situations. Software-level fixes — factory resets, firmware updates, data corruption repairs — carry no hardware risk and should always be attempted before any physical repair is considered. Cleaning dust from vents, applying compressed air to the card slot, and cleaning the headphone jack are all zero-risk maintenance tasks that any owner can perform safely.
Hardware DIY repairs are appropriate when the user has prior electronics experience, owns the correct tools (particularly the tri-wing Y00 screwdriver that is unique to Nintendo products), and is working on a device that is already out of warranty. The nintendo switch troubleshooting guide principle of "least invasive first" applies here — exhaust every software and cleaning option before opening the console.
Professional repair is the right choice for any repair involving soldering, the motherboard, water damage, or screen replacement on OLED models. The investment in professional service protects the device from additional damage and typically comes with a repair warranty that DIY work cannot offer. For users searching for nintendo switch console repair near me, looking for shops that specifically list gaming console repair services — rather than general electronics or phone repair shops — ensures the technician has specific Switch experience.
The best nintendo switch repair shop will offer a free or low-cost diagnostic assessment before quoting a repair price, use quality replacement parts, and provide a written warranty on the completed work. Same day nintendo switch repair is available at many local shops for common repairs like battery replacement, Joy-Con fixes, and speaker replacement, making professional service both fast and practical.
Nintendo Switch Repair Cost Overview
Understanding what repairs typically cost helps users budget accurately and avoid being overcharged. Prices vary between regions and repair shops, but the ranges below reflect typical market pricing at reputable local gaming console repair services.
| Issue | Estimated Repair Cost (Professional) |
|---|---|
| Joy-Con drift repair (per controller) | $30–$60 |
| Screen replacement (standard) | $80–$130 |
| Screen replacement (OLED) | $120–$180 |
| Battery replacement | $50–$90 |
| USB-C charging port repair | $50–$100 |
| Game card reader repair | $40–$80 |
| Fan replacement / cleaning | $40–$70 |
| Speaker replacement | $20–$50 |
| Water damage assessment and repair | $80–$200+ |
| Motherboard-level repair | $100–$300+ |
| Wi-Fi module replacement | $50–$100 |
| Power button flex repair | $30–$60 |
The nintendo switch repair cost for most common issues falls within a range that makes repair significantly more economical than replacement — particularly for the OLED model, which retails well above $300. Even for the Switch Lite, where the retail price is lower, repairing a known, isolated fault is typically more cost-effective than purchasing a replacement unit and transferring game data.
Preventative Maintenance Tips for Nintendo Switch Owners
Preventing problems before they occur is always preferable to repairing them after the fact. These nintendo switch repair tips apply to all three Switch models and can meaningfully extend the device's lifespan.
Always use official Nintendo chargers or certified USB-C chargers that support the USB Power Delivery standard. Cheap, uncertified chargers have been documented to cause charging port damage, battery management issues, and in some cases, motherboard-level faults from voltage irregularities.
Store the console in a protective case during transport. The Switch is a handheld device that travels — it needs impact and scratch protection. A hard-shell case protects the screen from pressure and prevents the Joy-Con rail buttons from being accidentally held during storage.
Clean the ventilation slots on the back of the console regularly using compressed air. Dust buildup is the leading cause of overheating in older units, and five minutes of preventative cleaning every few months can prevent a costly fan or thermal paste repair down the line.
Keep the game card slot covered when not in use. The plastic cover on the card slot prevents dust and debris from accumulating on the reader pins, which are the most common cause of game card reader failures.
Calibrate the Joy-Con sticks through System Settings every few months. Early drift detection allows for proactive maintenance — a light cleaning at the early stages of drift is far easier and cheaper than a full replacement after the problem becomes severe.
Get Your Nintendo Switch Repaired — Fast, Professional, and Affordable
If your Nintendo Switch is dealing with Joy-Con drift, a cracked screen, charging port issues, battery problems, or any of the other issues covered in this guide, professional repair is often the fastest and most reliable path back to gaming. Attempting complex hardware repairs without the right experience and tools is a genuine risk, and in many cases, the cost of professional repair is far less than what a mistake during a DIY attempt would cost to fix.
At DC Phone Repair, a team of certified and experienced technicians handles everything from nintendo switch joy con drift fixes and battery replacements to complex motherboard-level diagnostics — all with precision, care, and a commitment to getting your device back in working order as quickly as possible. Same-day service is available for the most common Switch repairs, and every repair is backed by a warranty so you can game with confidence.
The shop services all Nintendo Switch models, including the Switch Lite and Switch OLED, as well as a full range of other gaming consoles, smartphones, tablets, and laptops. Whether you need a quick diagnostic, an affordable battery replacement, or a complex screen repair, the team is ready to help. Walk-ins are always welcome, and online booking is available for added convenience.
Do not let a broken Switch keep you away from your games. Stop by, give the team a call, or schedule your repair online today.
DC Phone Repair
2704 Marion Barry Ave SE,
Washington DC 20020, United States
(202) 478-4799
https://dcphonerepair.com/
Frequently Asked Questions
How much does a professional Nintendo Switch repair typically cost?
Nintendo switch repair cost varies depending on the issue. Common repairs like Joy-Con drift fixes and battery replacements generally cost between $30 and $90 at most professional shops. More complex repairs like screen replacement, charging port work, or water damage assessment can range from $80 to $200 or more depending on the extent of the damage and the specific Switch model being serviced.
Is Joy-Con drift covered under Nintendo's warranty?
Nintendo has extended its repair policy for Joy-Con drift in several markets, including the United States, and has offered free repairs even for out-of-warranty Joy-Cons in many cases. However, availability of this free repair depends on your region and the current status of Nintendo's repair programs. If you are outside the warranty period or the free repair program is unavailable in your area, a professional nintendo switch repair service can replace the analog stick module at a reasonable cost.
Can a Nintendo Switch be repaired after water damage?
Yes, nintendo switch water damage repair is possible in many cases, but success depends on how quickly the device is brought in for service and how severe the liquid exposure was. The most important step is to power off the console immediately and not attempt to turn it on again before professional assessment. Delays significantly reduce the chances of full recovery, so bringing the device to a gaming console repair service as soon as possible is strongly recommended.
How do I know if my Nintendo Switch needs a battery replacement or a charging port repair?
The easiest way to distinguish the two is by testing with multiple certified chargers and cables. If the console charges inconsistently or only at certain cable angles, the charging port is likely the issue. If the console shows no charging response regardless of the cable or charger used, both the battery and port should be professionally tested. A proper nintendo switch repair service will run diagnostics on both components before recommending any specific repair.
Is it worth repairing a Nintendo Switch, or should I just buy a new one?
For most common issues, repair is significantly more economical than replacement. Even the most costly professional repairs — like screen replacement or motherboard work — typically cost less than a new console, especially for the Switch OLED. If the console has sentimental value, saved game data, or a large digital game library, repair preserves all of that while restoring full functionality at a fraction of replacement cost. Consulting with an affordable nintendo switch repair shop for a diagnostic assessment is the best way to make an informed decision.
Can I fix Nintendo Switch Joy-Con drift myself, or do I need a professional?
Minor drift caused by dust or debris can often be reduced at home using compressed air or contact cleaner without any disassembly. However, the permanent solution — replacing the analog stick module — requires specific tools, including a tri-wing screwdriver, and careful handling of fragile ribbon cables. If you have no prior experience with electronics repair, professional joy con drift fix service is the safer and more reliable choice, and it typically costs $30 to $60 per controller at most local gaming console repair shops.
Frequently Asked Question
Welcome to our FAQ section! Here, we've compiled a list of commonly asked questions to provide you with quick answers and assistance. If you don't find the answer you're looking for, feel free to contact us directly, and we'll be happy to help.
How long does your repair service take?
At DC Phone Repair, we are able to fix most phones within 10-15min. Walk-in Welcome, We carry all parts including phone screens, charger port, iPhone batteries, android batteries, ear speakers, black glass, loud speakers, Samsung pens and many more. We can fix your cracked screen or broken phone screen within minutes.
Can DC phone repair fix water damaged phones?
We can fix any phones, if you dropped your phone in the water no worries, DC phone repair can repair you phone. our experiences techs can run diagnostics on your device and tell you exactly what is the issue and fix it quick. Our diagnostic is completely FREE!
DO I NEED AN APPOINTMENT OR CAN I WALK-IN?
We welcome all customers including Walk-ins and appointments. Most repair times are less than 10-15mins so you don't have to leave your device with us most of the time. We Love our customers at DC Phone Repair and we strive to serve our customers in the best we can.
WHAT KIND OF PHONE REPAIR SCREEN OPTIONS DO YOU PROVIDE?
At DC Phone Repair, We carry all different types of screens, including OLED replacement Screens, LCD screens, OEM apple screens, OEM Samsung screens, call us today so we can fix your phone right!
-
00
+Glorious Years
-
00
k+Happy Customer
-
00
k+Service Complete
-
00
%Satisfactions